Wazuh to Shuffle SOAR Automation: VirusTotal Enrichment, and Email Alerting
This lab focuses on moving from manual log analysis to automated detection. Instead of reviewing every log after an attack, the idea is to simulating attacks and observe what indicators appear during an attack, identify the most reliable fields, and then convert those observations into detection rules. Once these rules are in place, similar activity in the future will automatically generate alerts. This demonstrates how critical logs are, and how proper analysis and visibility turn raw data into actionable detection and faster incident response.
Simulating the Attack
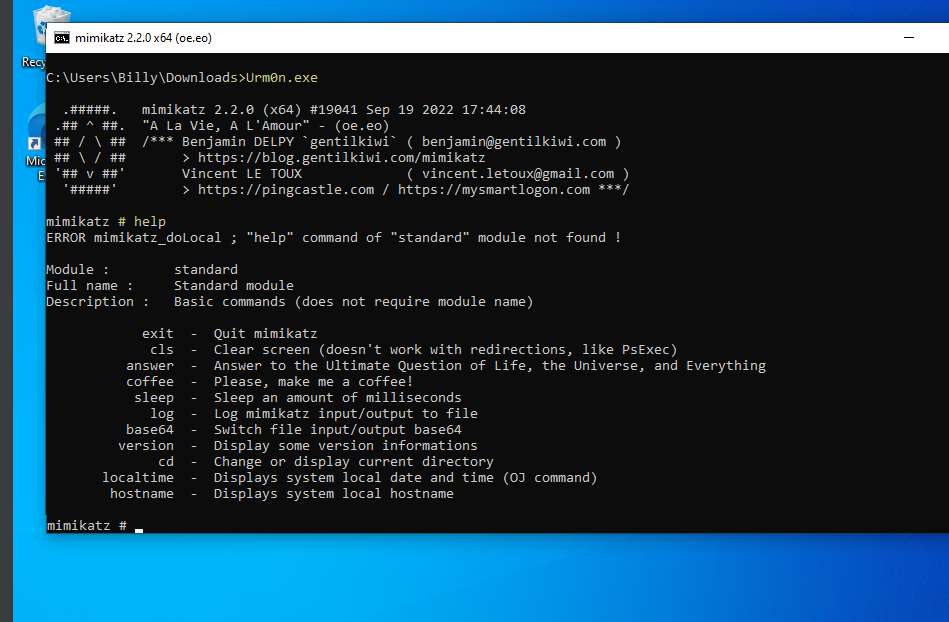
To simulate the attack, I used mimikatz, a well-known post-exploitation tool used to extract credentials and password hashes from memory. In real scenarios, it interacts with the LSASS process, but in this lab the focus is limited to detecting its execution rather than its credential access behavior.
To avoid simple detection based on filename, the binary was renamed to Urm0n.exe. Windows Defender was disabled and the download directory excluded to allow execution in a controlled lab environment. The tool was then executed using its command-line interface, which triggered process creation logs.
Sysmon successfully generated the event logs on the Windows endpoint. 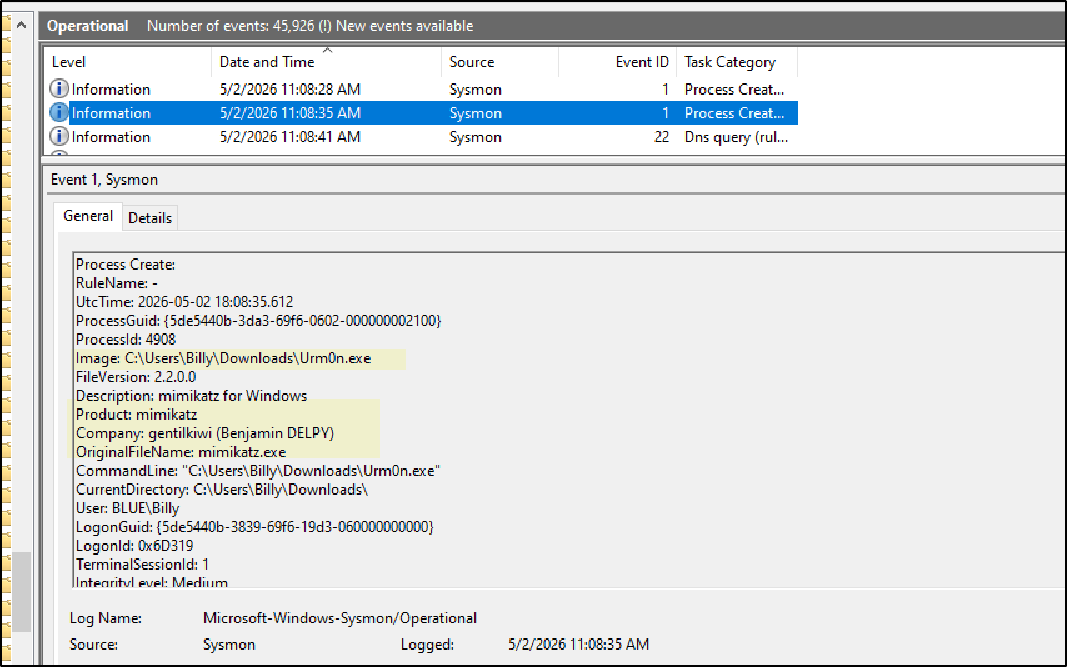
As part of the lab setup, Wazuh was already configured to collect all Sysmon logs into the archives. After executing the activity, the related logs were visible in the Wazuh archive logs, confirming that the events were being collected correctly. 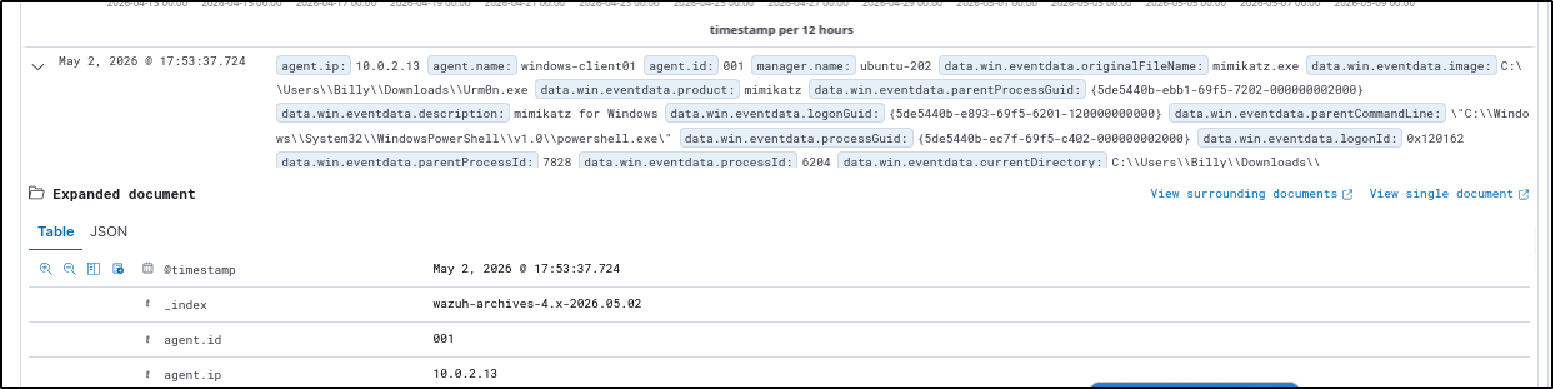
Based on the above event showing the execution of the Mimikatz file, we will now create a custom Wazuh rule to detect and generate alerts for this activity.
Defining Detection Rules
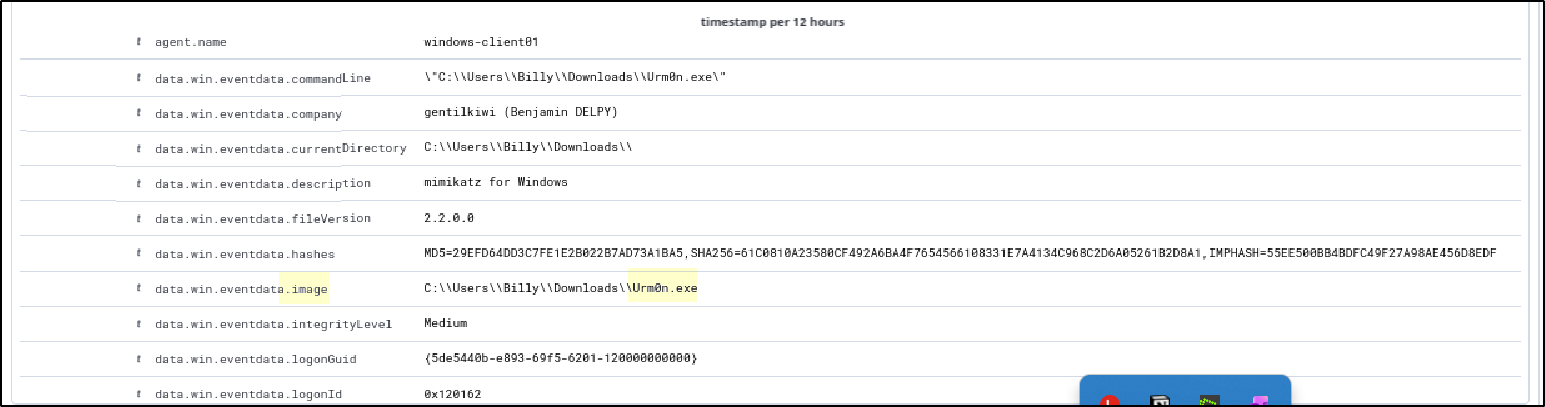
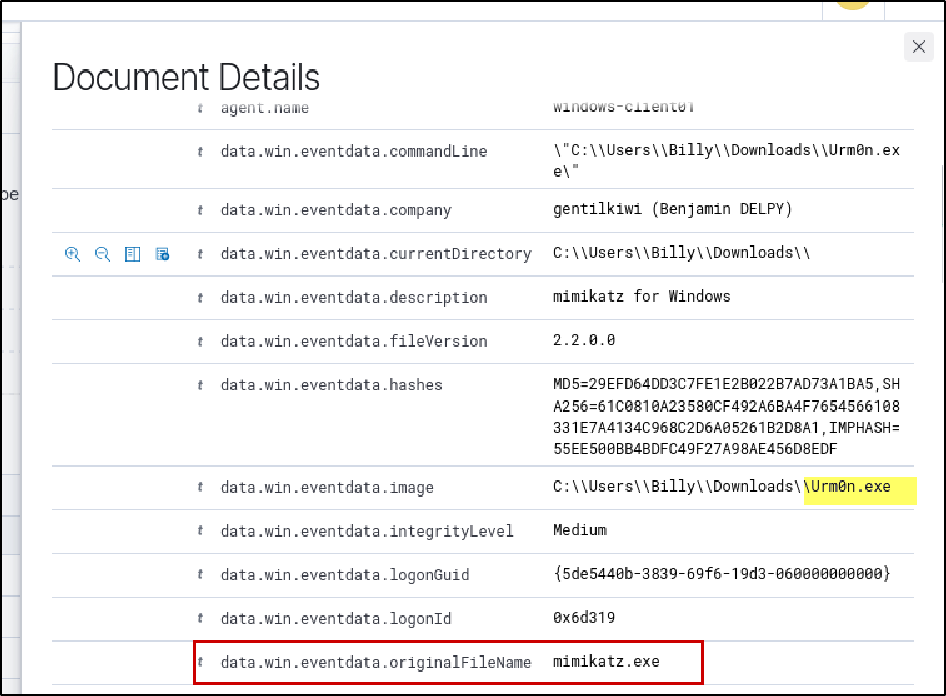
Once executed, mimikatz generated process creation logs (Event ID 1 via Sysmon). Although we cannot see the internal commands executed within mimikatz, we can observe that the process was launched. These logs contain several useful fields such as the process image, command line, parent process, and process identifiers. While many of these fields are useful for deeper investigations and correlation, this lab focuses on key indicators like the image name, command line, and especially the original file name.
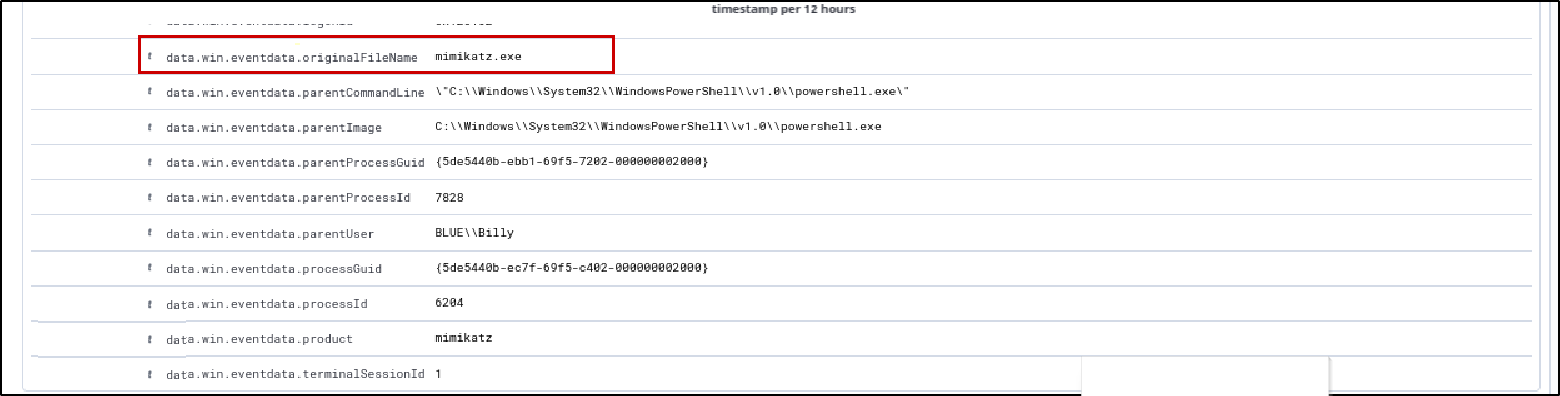
The reason for emphasizing the original file name is that attackers can easily rename executables, but certain embedded metadata often remains unchanged. This makes it a more reliable indicator compared to fields like the image name which can be manipulated.
By defining conditions based on observed indicators, we can ensure that suspicious activity is flagged immediately.
Now we create a rule to detect mimikatz execution.
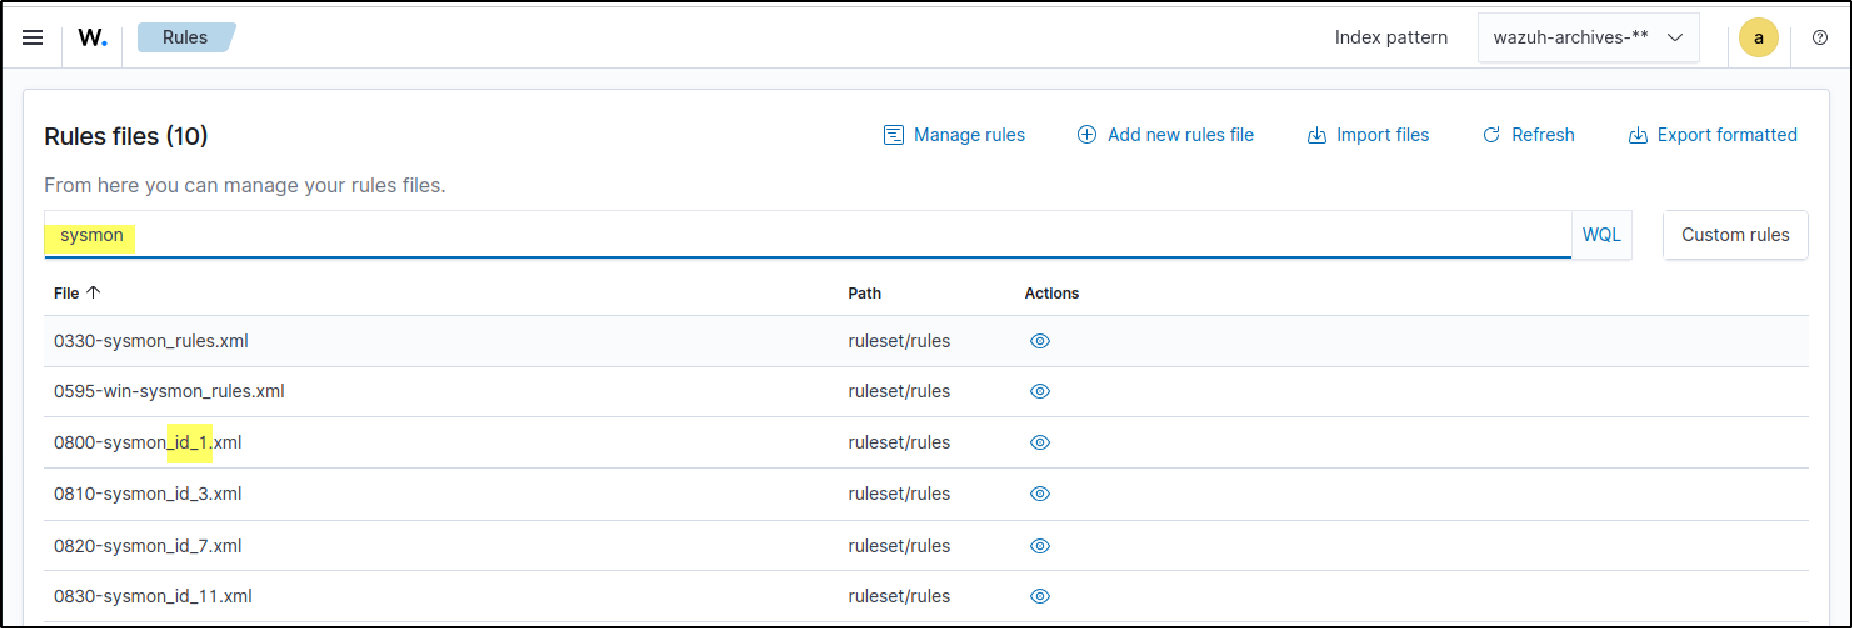
Now we will create a rule to detect mimikatz execution. Go to Server Management → Rules.
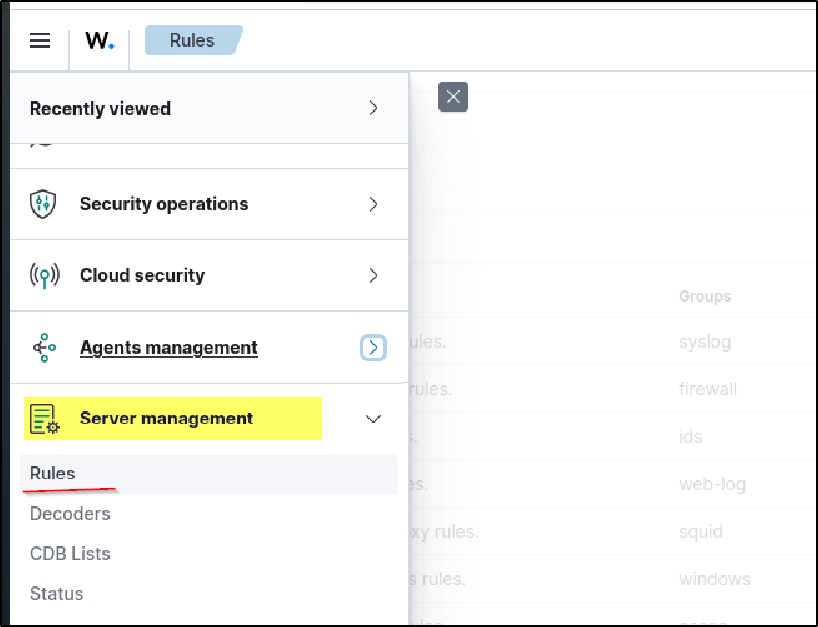
Since we are working with Sysmon logs (Event ID 1), search for “sysmon” to see how default rules are written. You will find files like id_sysmon_id01.xml, which can be explored to understand existing detection logic.
Since we are creating our own detection, we will not modify default rules. Instead, go to Custom Rules, where you will find local_rules.xml.
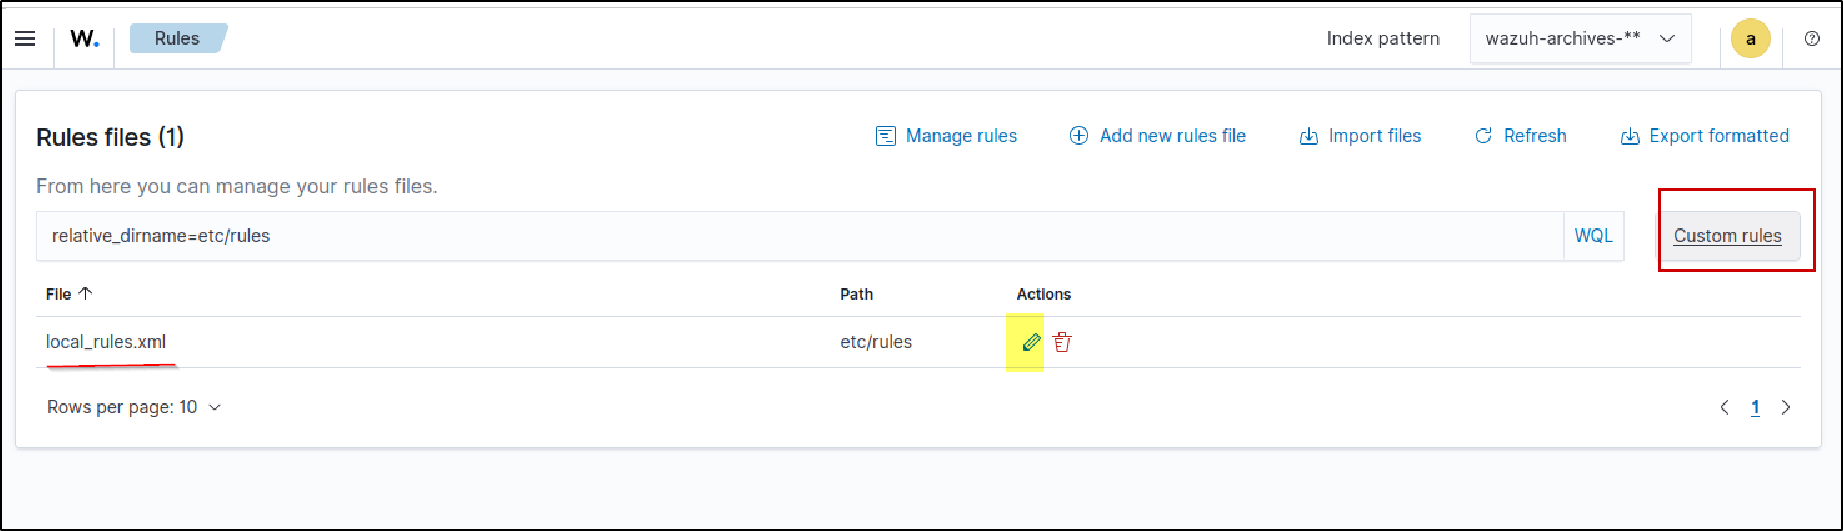
Open it using the edit (pencil) icon and add your custom rule there.

This Wazuh rule (ID 100002) detects Mimikatz execution via Sysmon process creation logs, using regex to match the binary’s original filename and triggering a level 15 (critical) alert mapped to T1003 Credential Dumping.
Trigger Attack and Monitor Alerts
After running the test again, the alert was successfully generated — but it appears in the wazuh-alerts-* index, not in wazuh-archives-**.
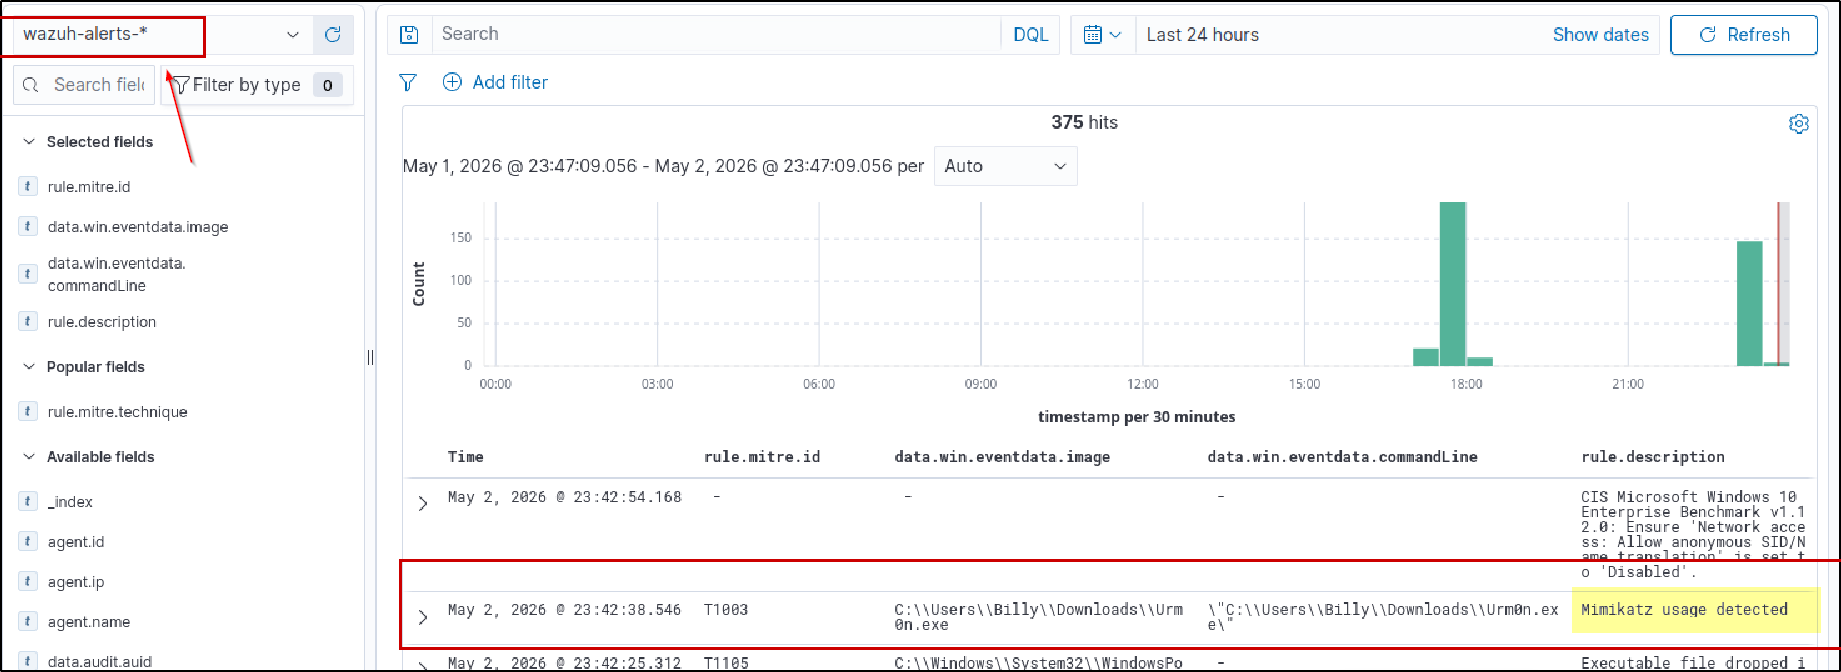
Expand the alert to see detailed event data, such as the user who executed the process, the process ID (PID), and the parent process ID (PPID), which help in understanding process relationships
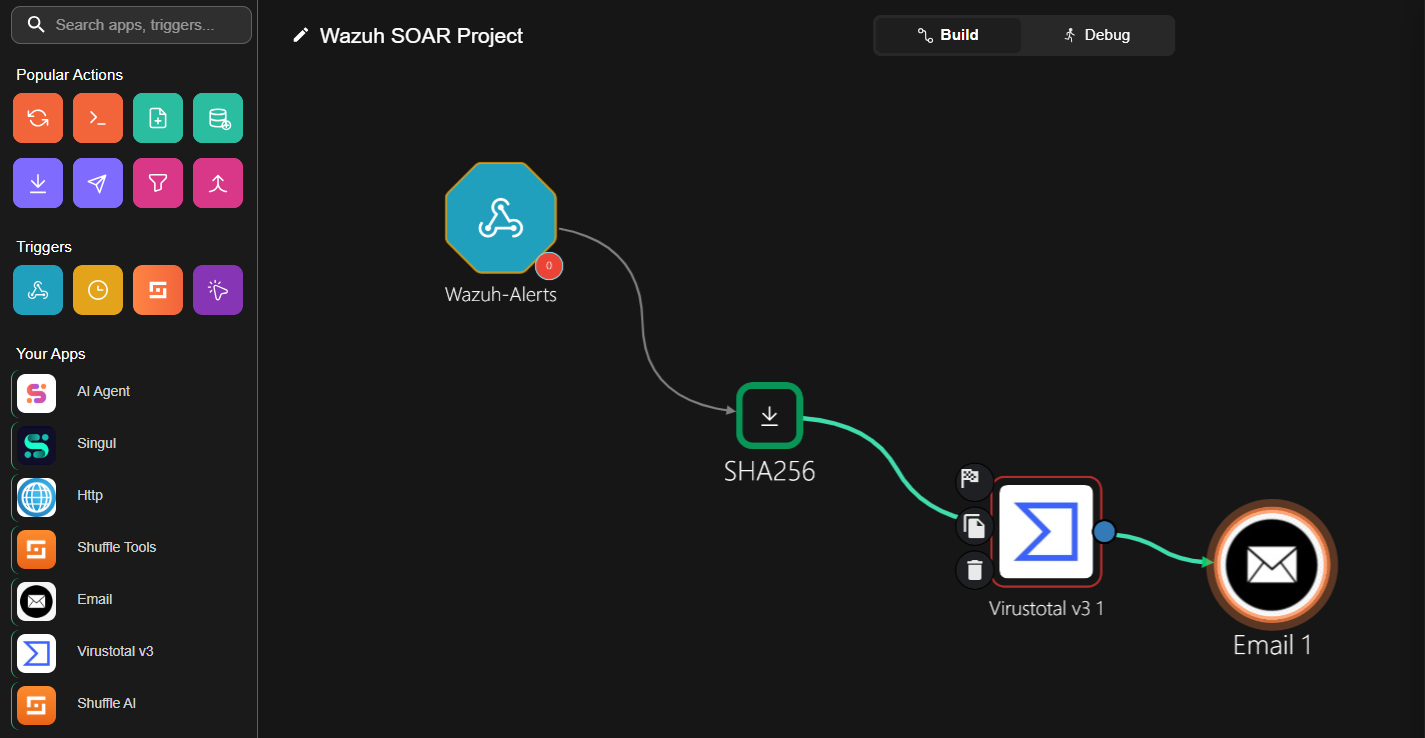
Send Alerts to Shuffle (Workflow Overview)
Wazuh (triggered rule ID + alert details) → Extract SHA256 from logs → VirusTotal hash lookup → Send enriched alert via Email
1. Create Shuffle Account & Workflow
Create a Workflow in Shuffle
- Go to your Shuffle account and open the Workflow tab
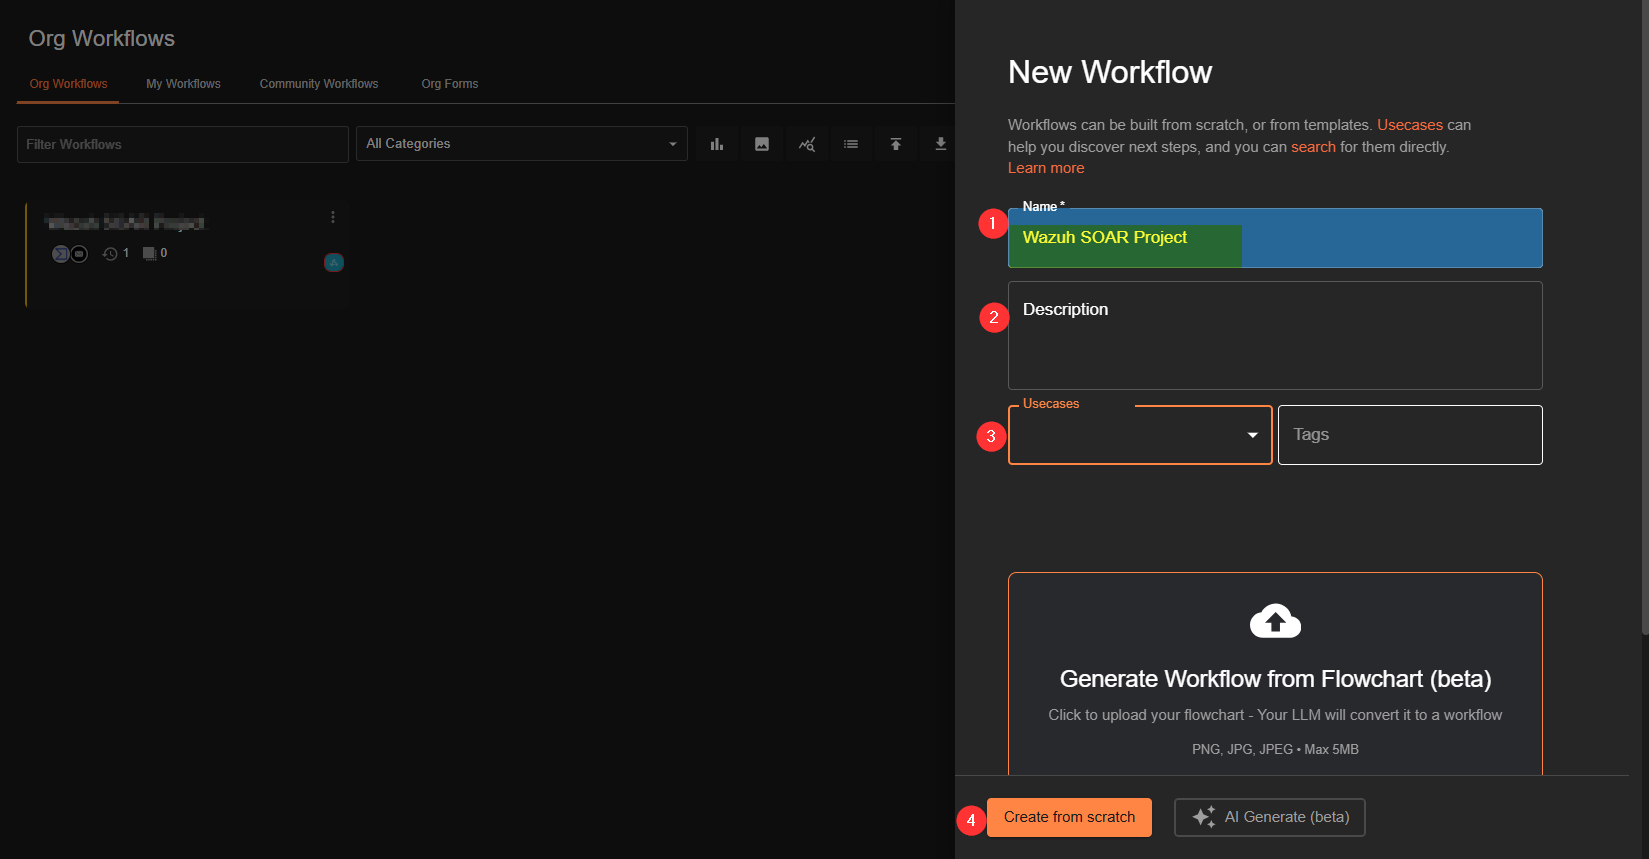
- On the right side, click “Create New Workflow” Provide:
Name→ (e.g., Wazuh Alert Lab)Description→ brief explanation of the labUse case→ select any (not important here) Choose“Create from scratch”
A default ChangeMe node will appear in the workflow, we will edit thislater Now add a Webhook trigger:
- Find the blue triangle Webhook icon, click it will load the app
- then Drag it into the workspace
- Connect it to the ChangeMe node
Rename the webhook to wazuh_alerts or anything, then copy the generated webhook URL —this will be used in your Wazuh configuration to forward alerts into your Shuffle workflow. 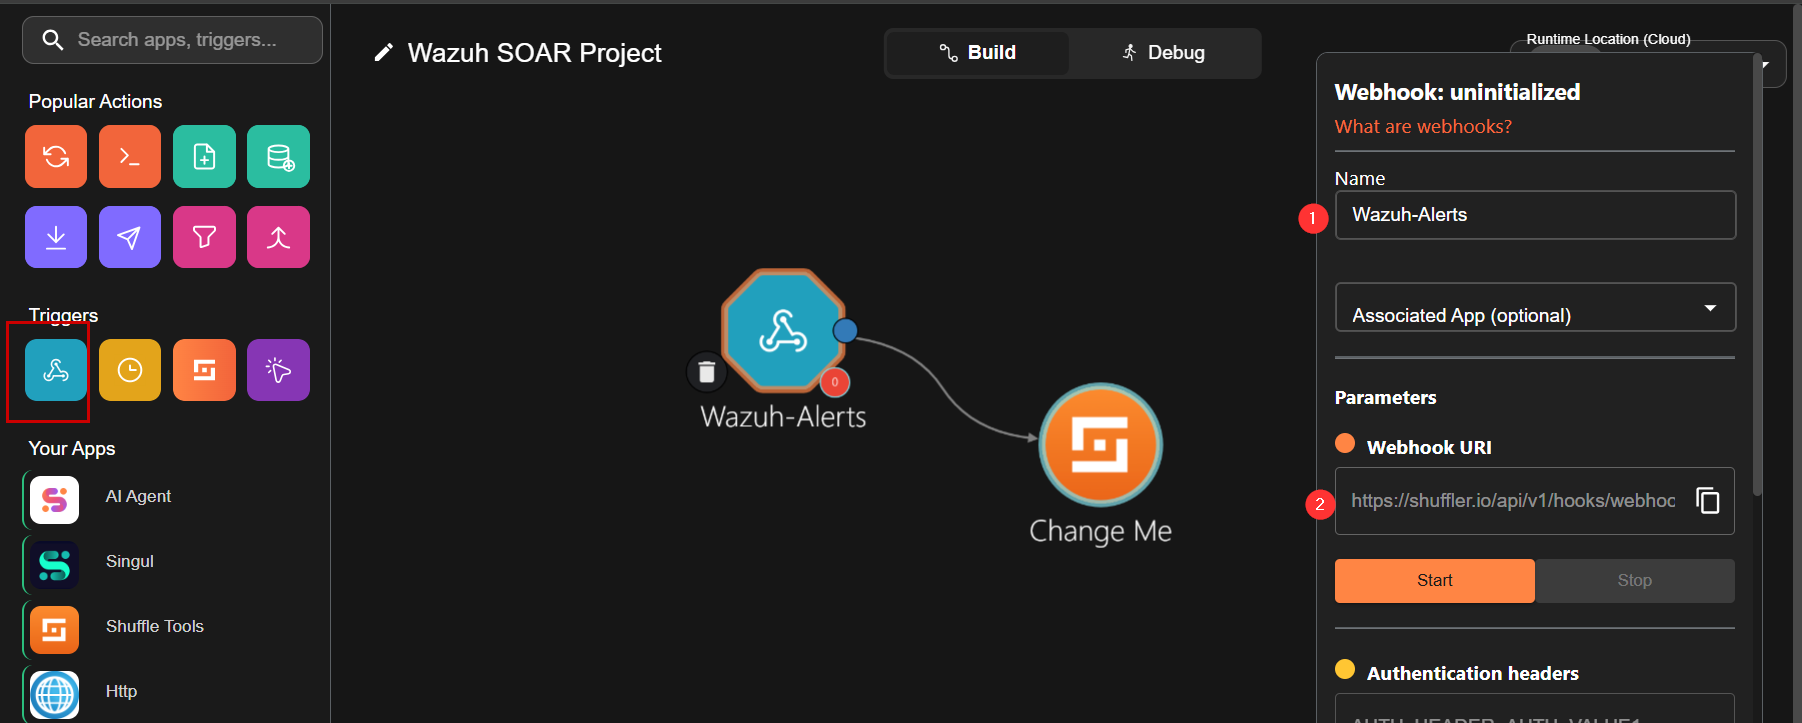
Configure Wazuh Server
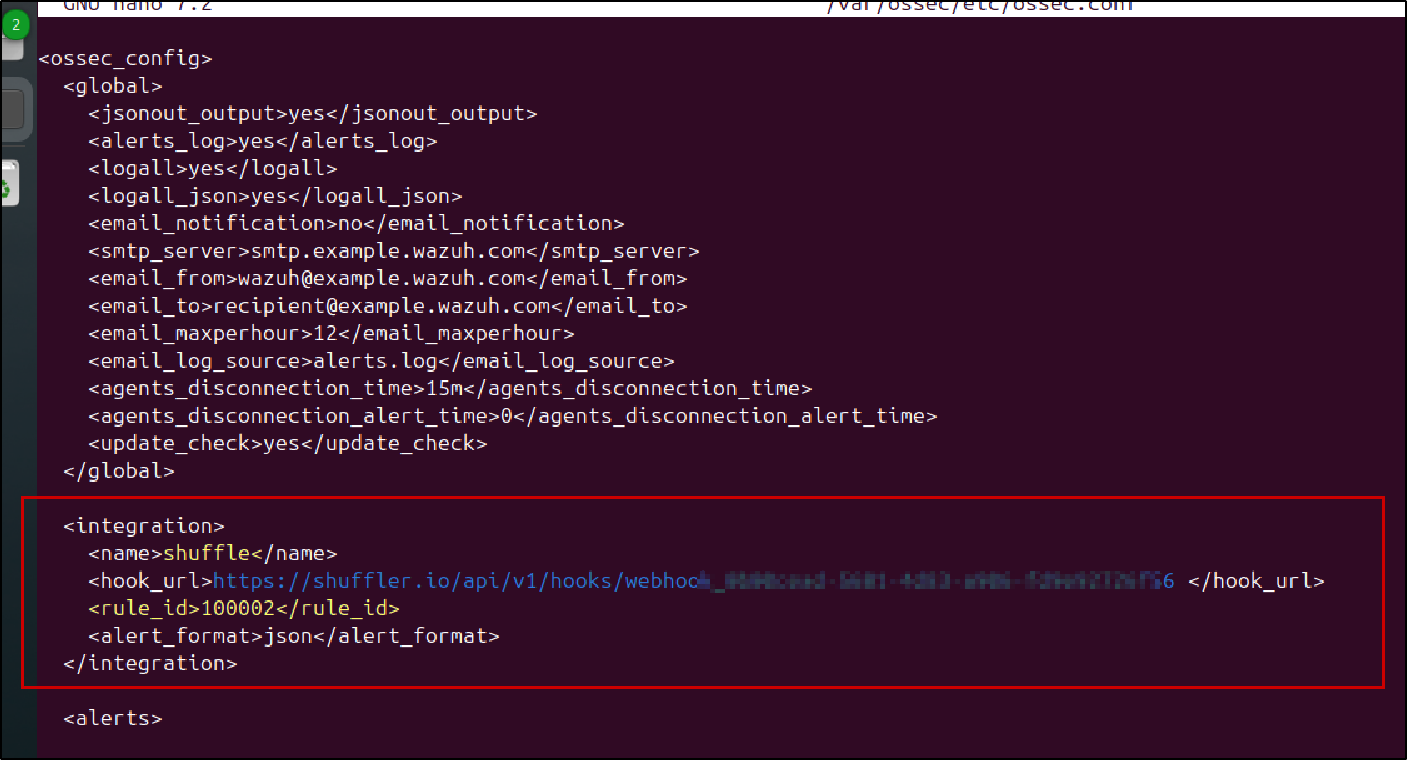
On your Wazuh server (Ubuntu), edit the configuration file: sudo nano /var/ossec/etc/ossec.conf
Add the webhook integration:
1
2
3
4
5
<integration>
  <name>webhook</name>
  <hook_url>YOUR_SHUFFLE_WEBHOOK_URL</hook_url>
  <rule_id>YOUR_RULE_ID</rule_id>
</integration>
- Replace the webhook URL with the one copied from Shuffle
- Use a specific rule_id (e.g., Mimikatz detection rule) to trigger alerts
Restart the Wazuh manager: sudo systemctl restart wazuh-manager to add changes made.
Modify the default node
Select the ChangeMe node and configure it by setting the action to “Repeat back to me”, then add(+) an execution argument to pass the webhook data. 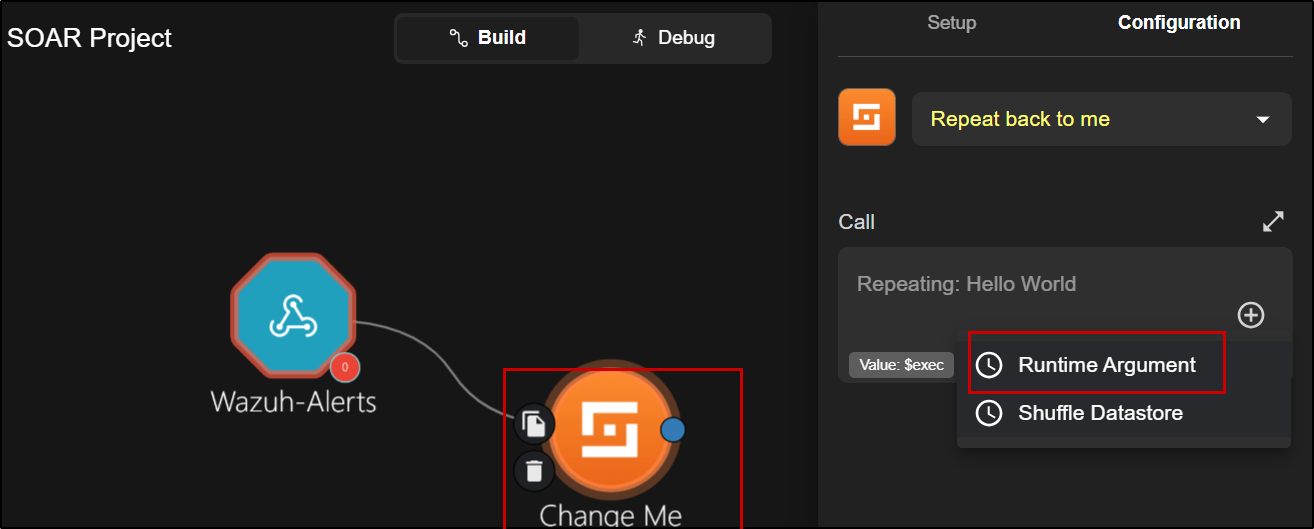 This allows you to view the complete alert payload received from Wazuh, making it easier to debug and verify the integration. Save the workflow and click Start, then use the person icon (test trigger) to simulate an alert and confirm that the data is being received correctly.
2, Trigger Attack and Capture Alert
Execute Mimikatz on the Wazuh agent (client machine), then verify that an alert is generated in Wazuh and successfully forwarded to the Shuffle workflow. 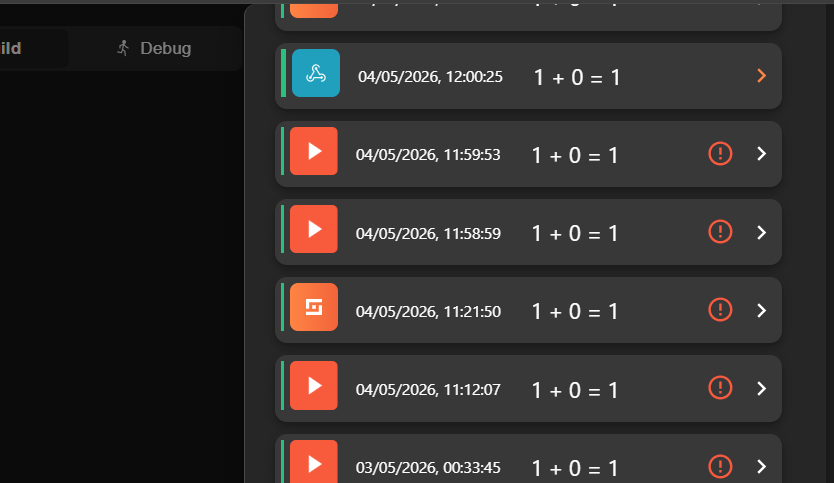
Open the workflow execution, confirm the alert is received
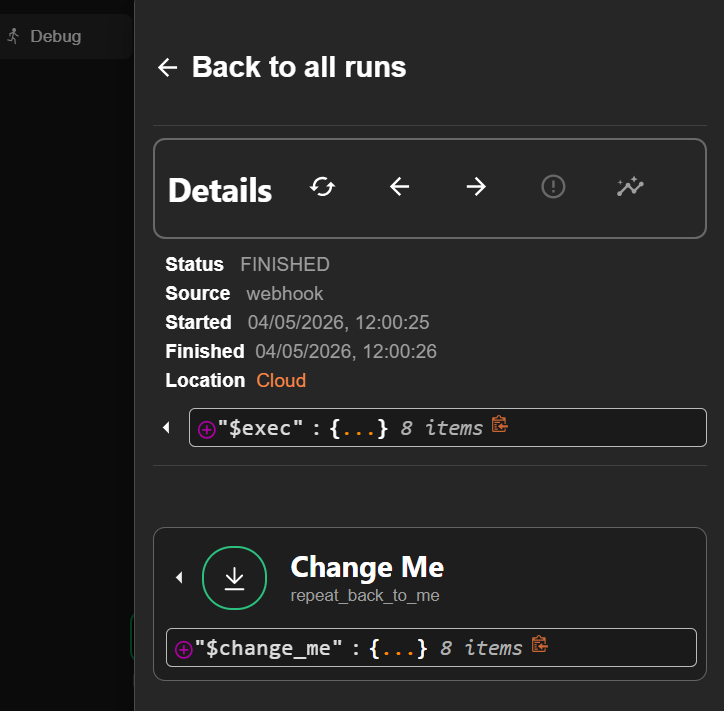
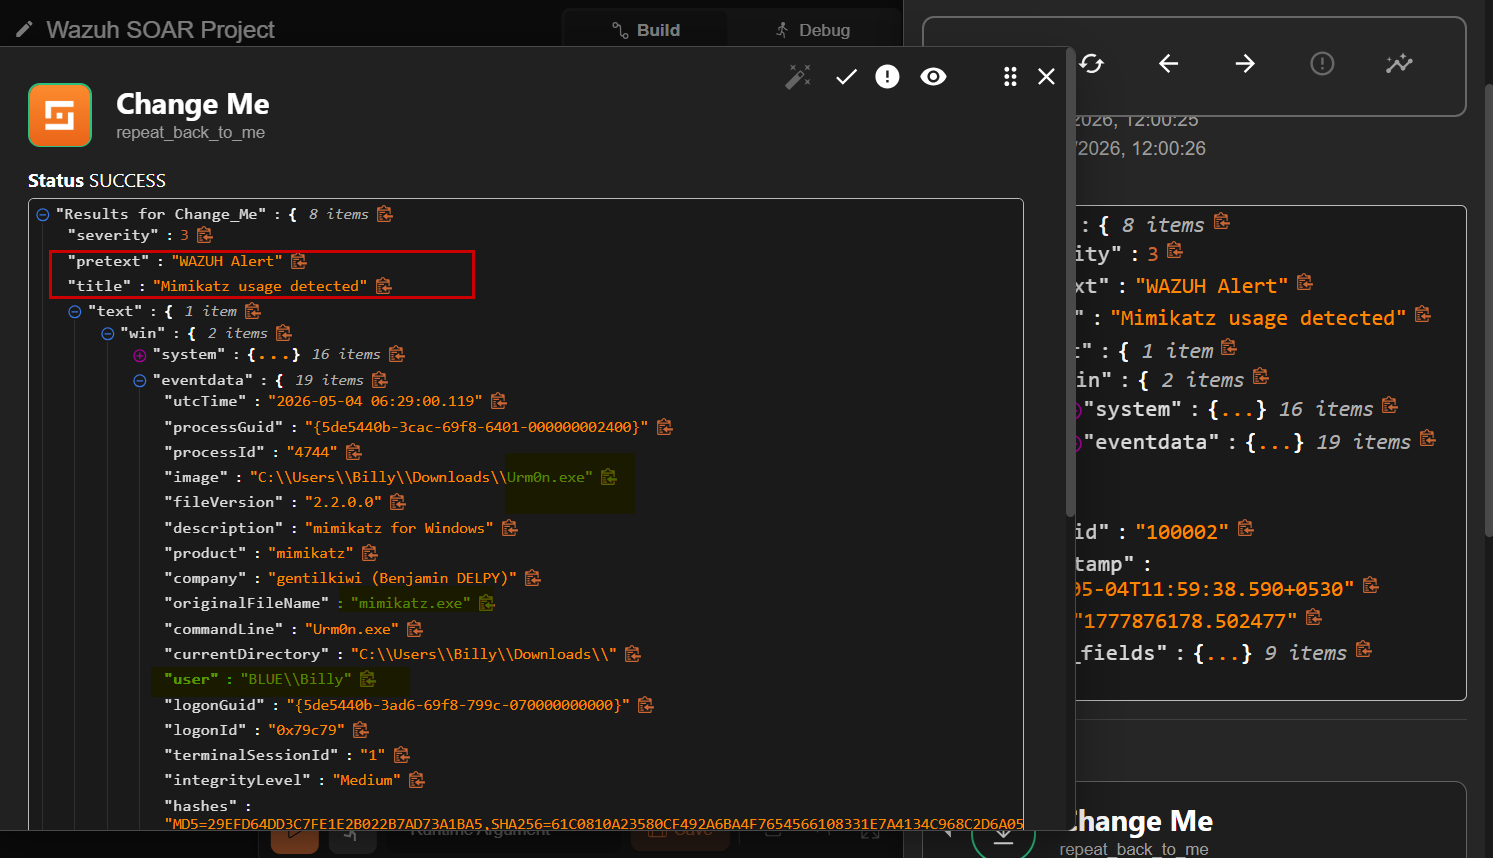
expand the ChangeMe node to view the full alert details—matching what is seen in a Wauh —confirming successful integration.
3. Extract SHA256 from Logs
From the received alert logs, extract the SHA256 hash so it can be sent to threat intelligence platforms (e.g., VirusTotal) to determine whether the executed file is malicious.
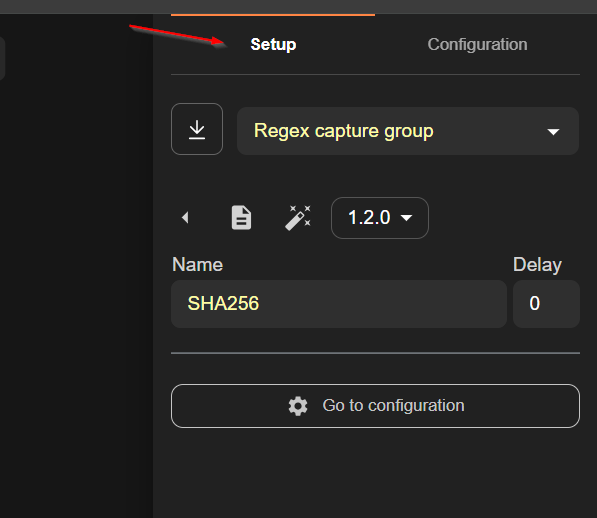
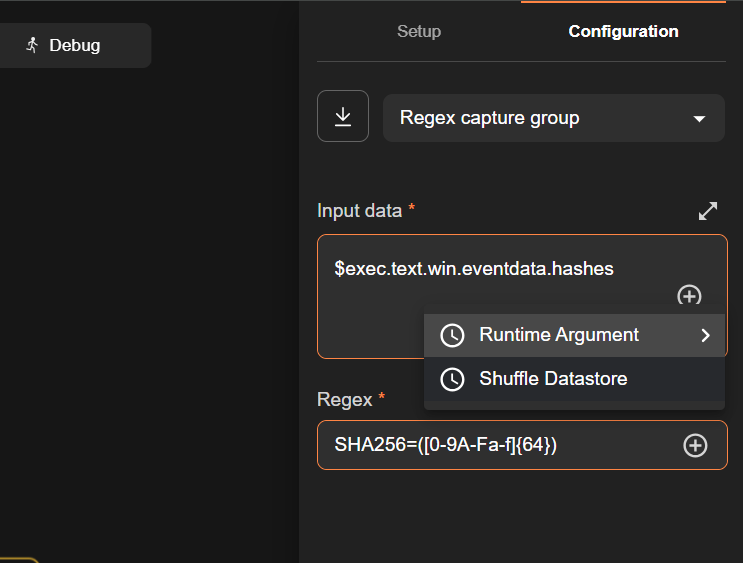
To begin, rename the Change Me node to SHA256 and set the action to Regex Capture Group.
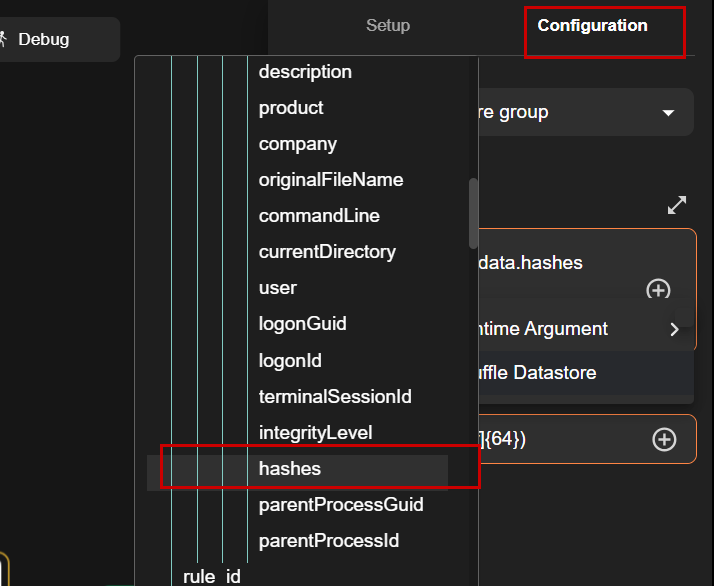
Under the Input Data field, select the Hashes field (this contains MD5, SHA1, and SHA256 values) using the + icon in the configuration tab.
Next, apply the following regex pattern to extract the SHA256 value:
Save the workflow and click Test. 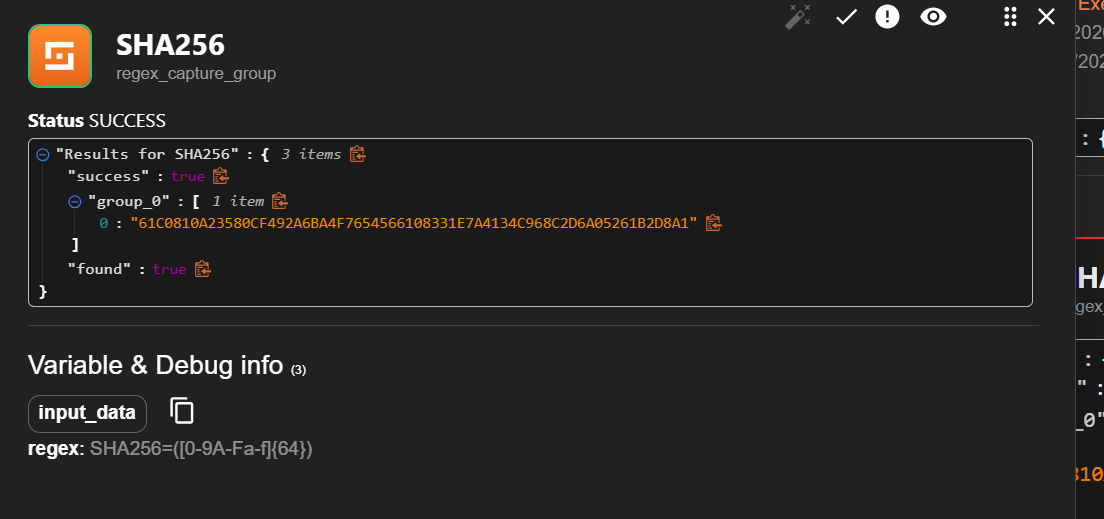
The output will first display the received log, followed by the successfully extracted SHA256 value. Expand the results to view the extracted hash.
4. Perform VirusTotal Lookup
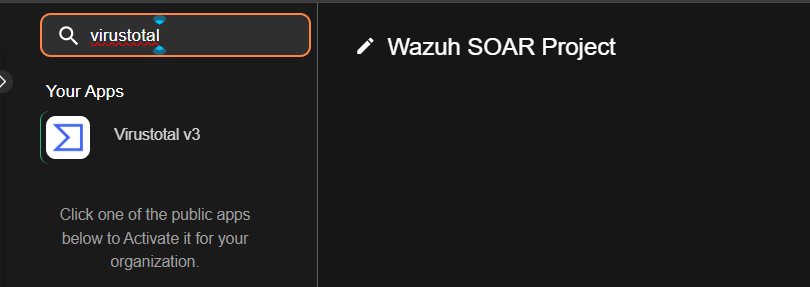
To enrich the alert, integrate VirusTotal into the workflow and perform a hash lookup using the extracted SHA256 value.
- Search for VirusTotal in the left sidebar, select it, and drag it into the workflow
- Connect it to the sha256_extract node
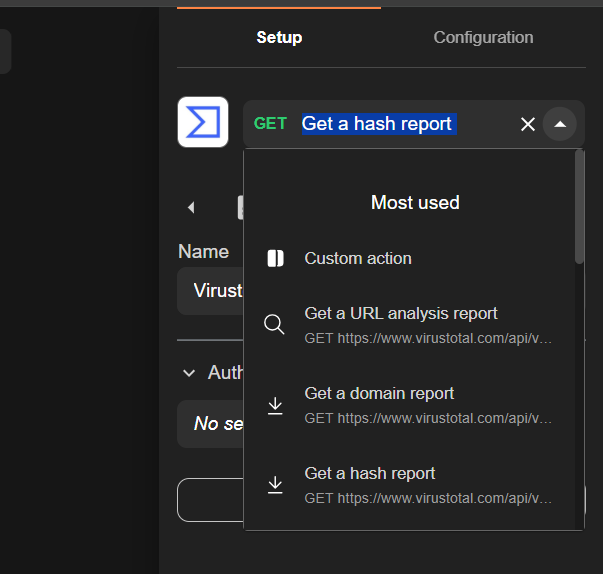
Under the setup section, choose “Get a hash report”, since we are performing a lookup using a file hash.(not domain or IP)
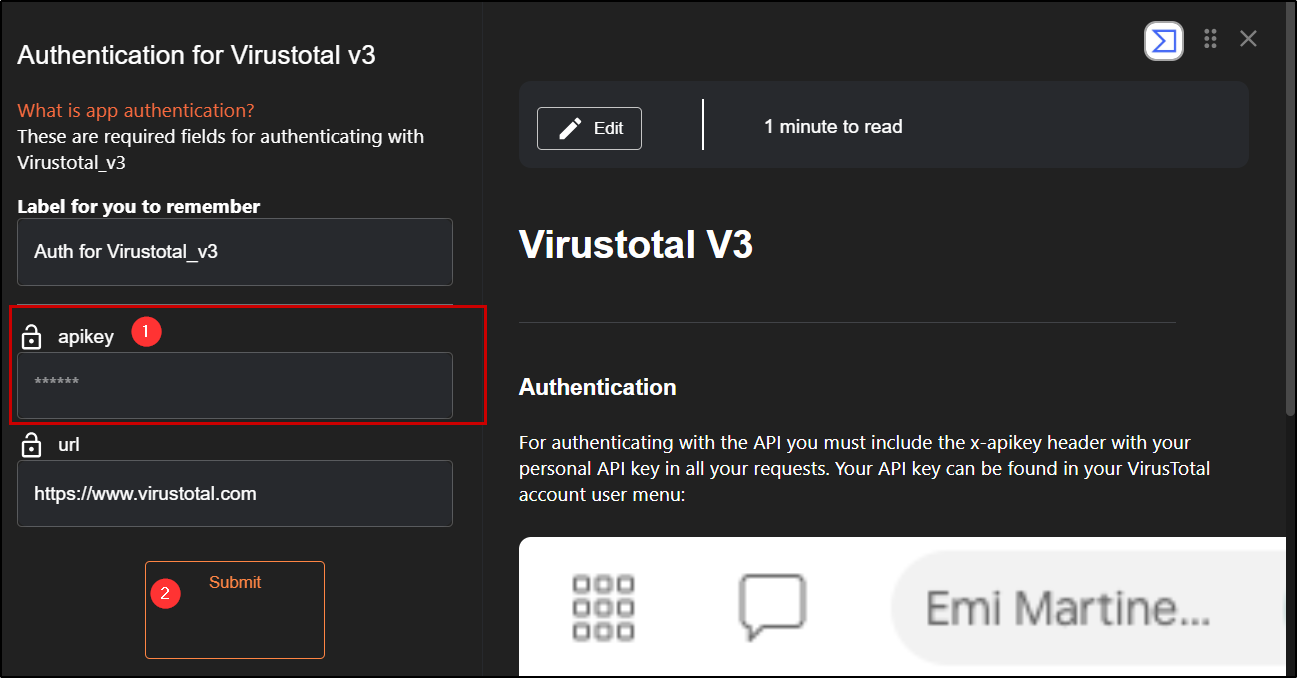
Sign up on VirusTotal and copy generated an API key
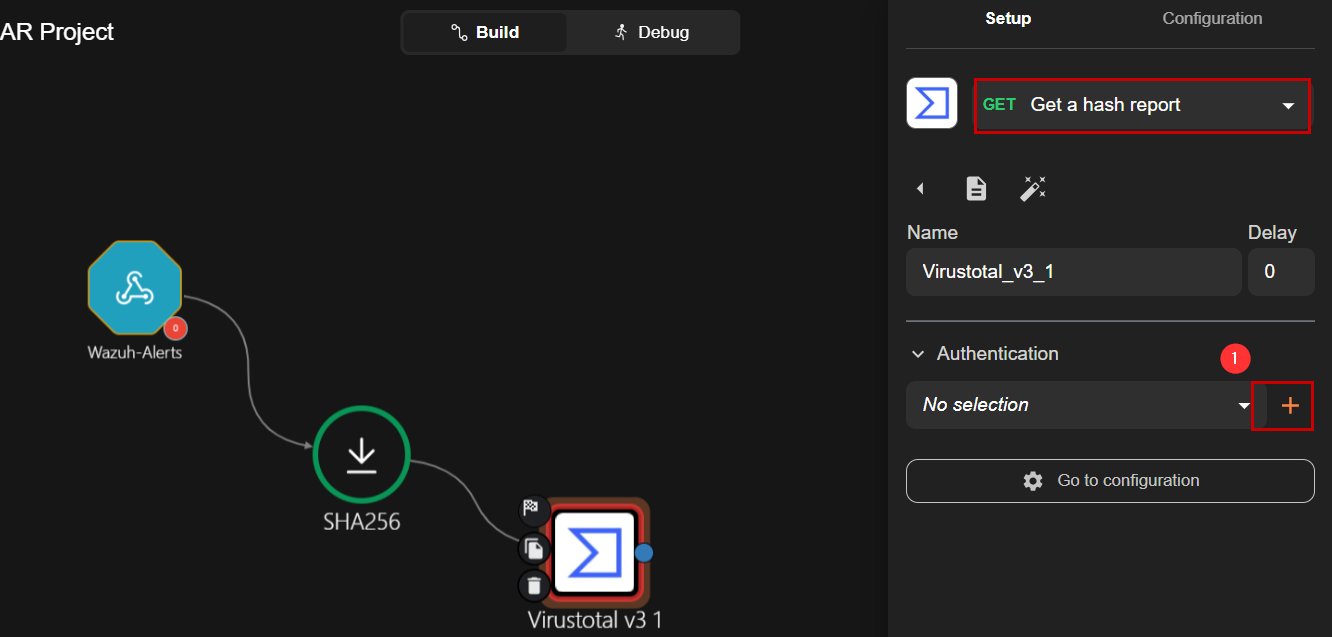
Under Authentication, click the + icon, add your API key, and ensure the URL is set to VirusTotal;
however, in some cases (as I experienced), the test may still fail even with correct details because the URL gets mapped incorrectly (e.g., to a secret field),
so to fix this, go to the Configuration tab and manually add the API key, URL and then for the hash field click the + icon, select the previously created sha256_extract node, expand it, and choose “group list” to pass the extracted SHA256 value.
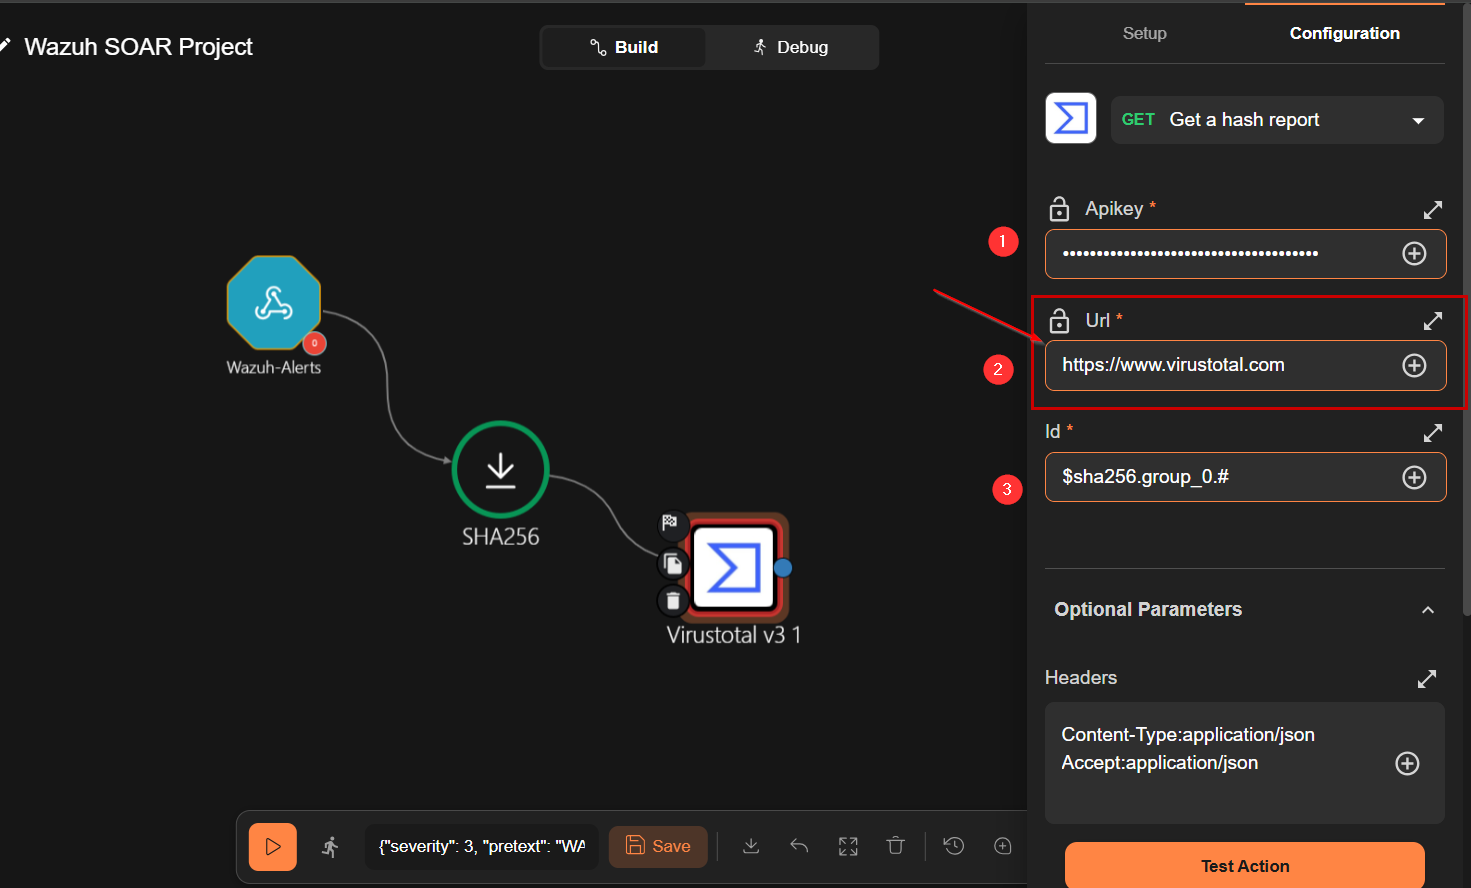
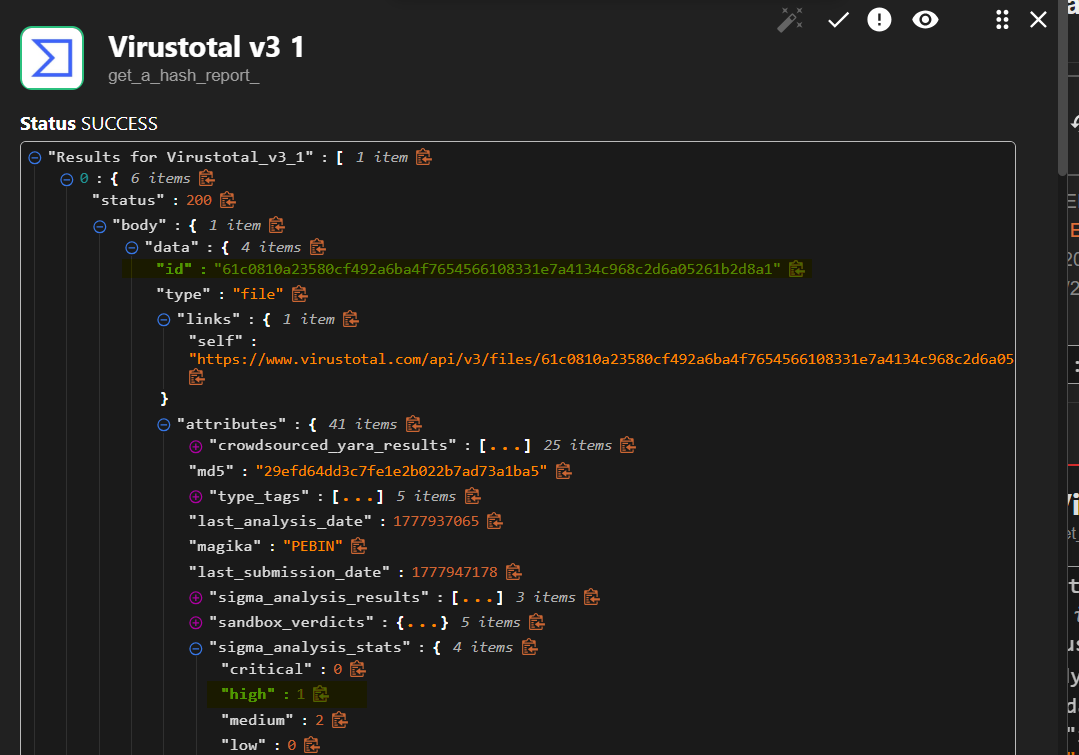
Finally, save the workflow and click Test to verify the integration.
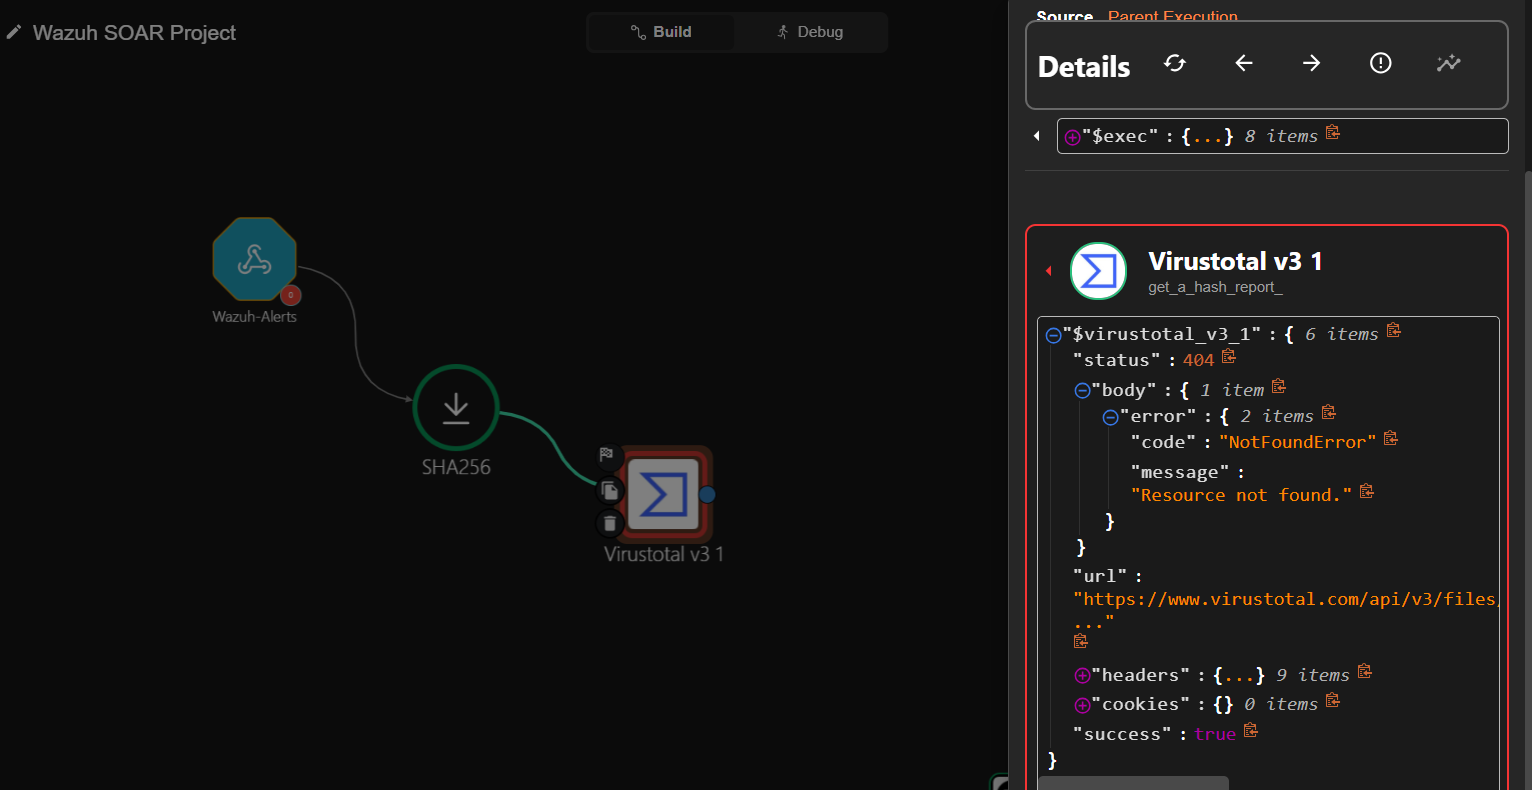 After testing, expand the results to view detailed information such as file name, metadata, and malware family.
In the Last Analysis Stats, you may see detections such as malicious: 64, which can be verified by manually searching the same SHA256 hash on VirusTotal. 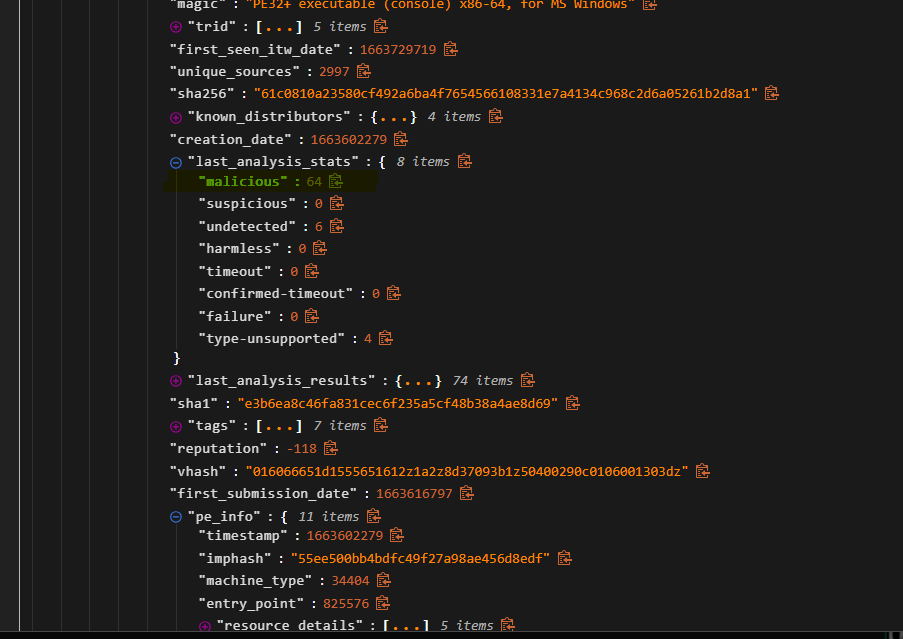
4. Send Alert via Email
Log in to Shuffle using your email account then on shuffle, search for Email in the left sidebar and drag it into the workflow.
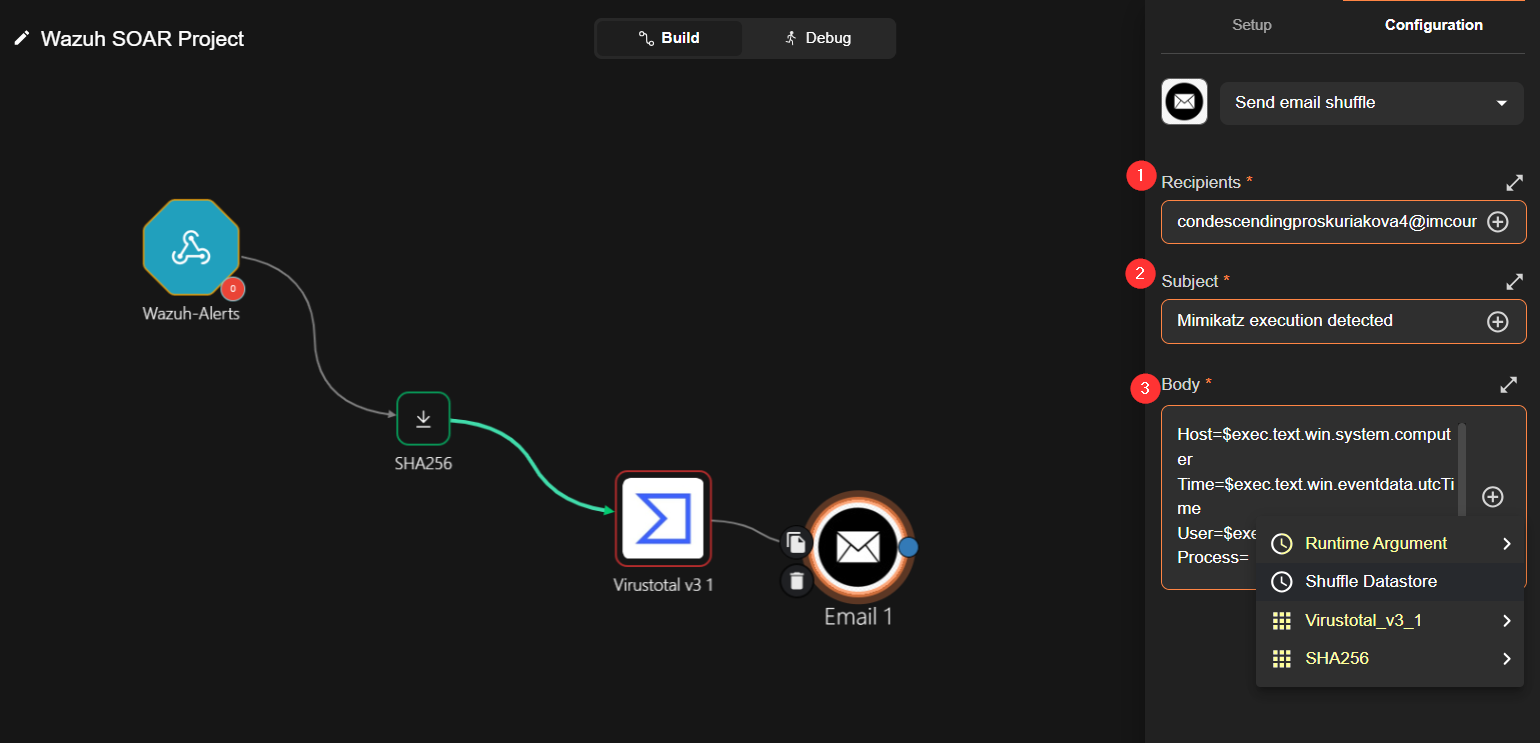
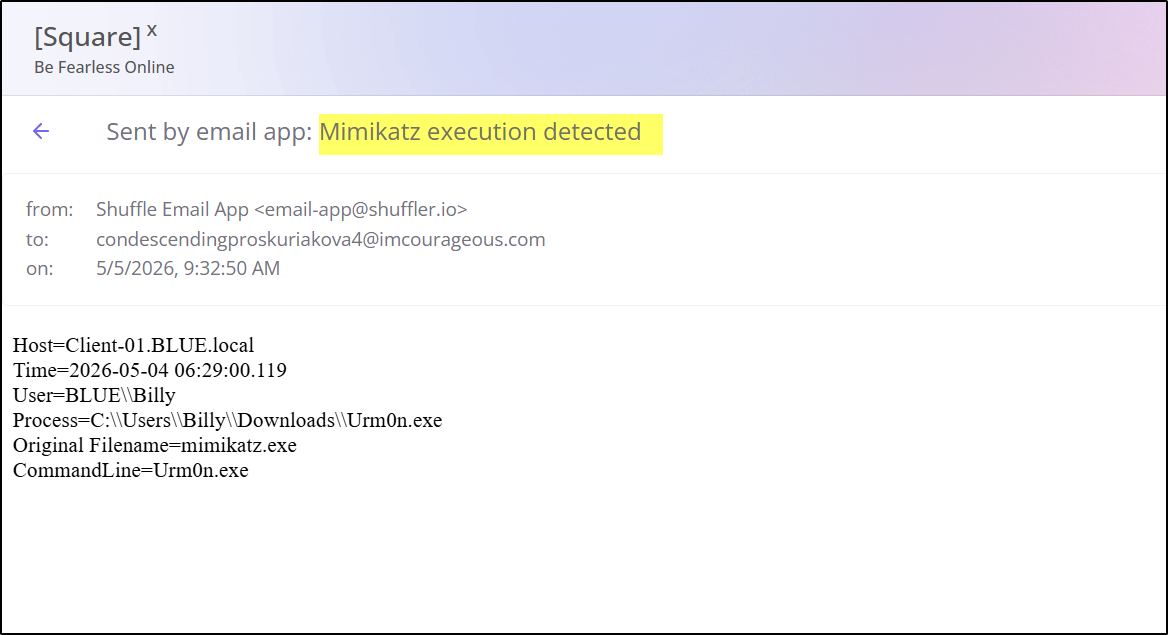
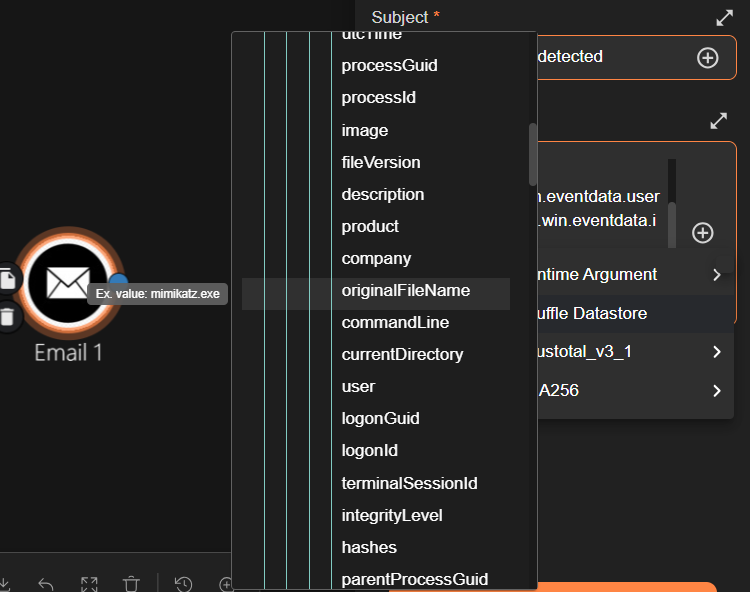
Configure the email by setting the recipient address and a suitable subject. In the body, include relevant alert data by adding either Runtime arguments or fields from the VirusTotal node —expand and select fields such as time, host, user, image, original filename, and command line so they are included in the email content.
Save the workflow and click Test Action to trigger it
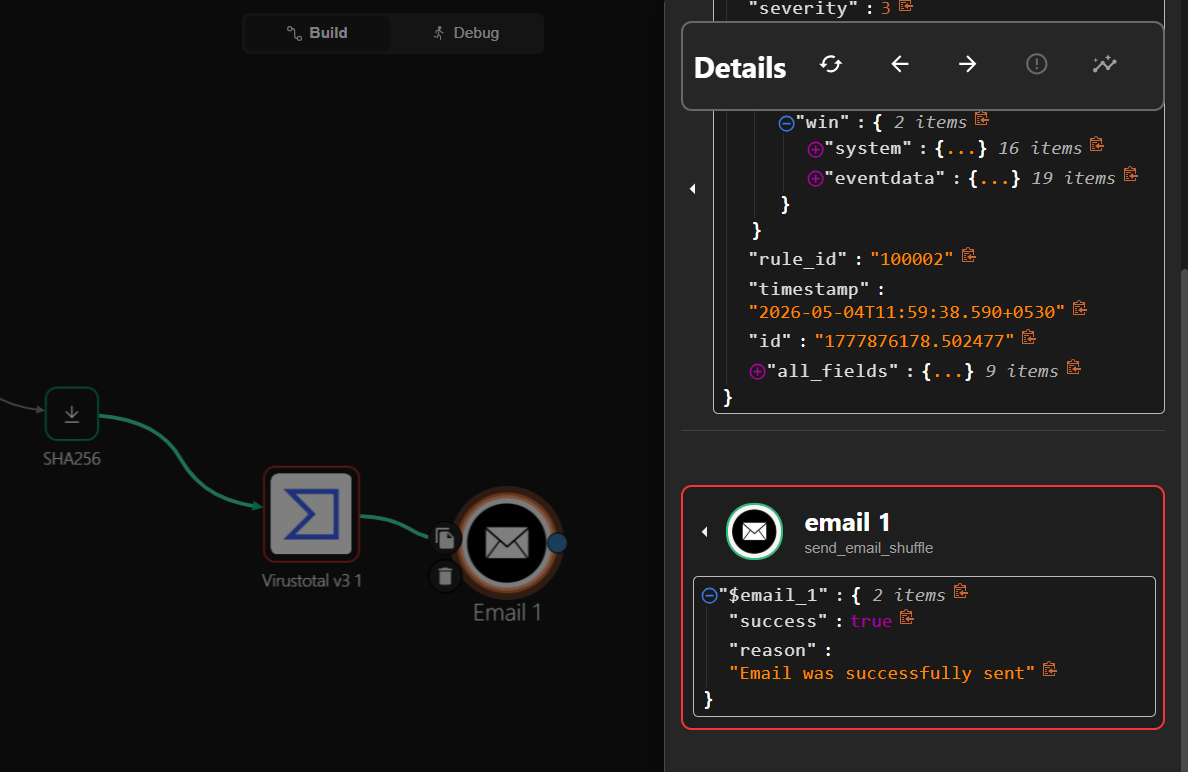
You should receive the alert details via email, confirming that the notification workflow is working successfully.