Wazuh FIM + VirusTotal + Active Response
In this lab, we will build an automated malware detection and response workflow using Wazuh FIM, VirusTotal integration, and Active Response. When a malware sample is downloaded into a monitored directory, Wazuh detects the file activity, generates its hash, VirusTotal lookup the hashes of files, and automatically removes the file if it is flagged as malicious.
FIM Configuration
I chose two additional folders to monitor on the Windows agent besides the default monitored directories and registry files:
1
2
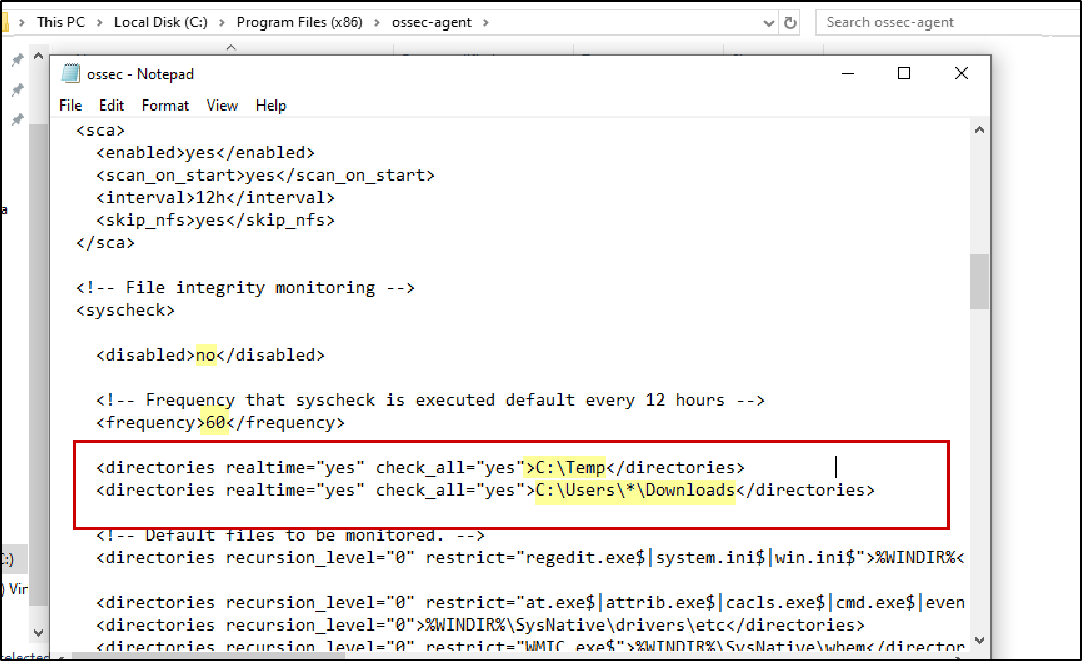
C:\Temp folder
C:\Users\*\Downloads folder
Now , Open Notepad as Administrator and open the Wazuh agent configuration file: C:\Program Files (x86)\ossec-agent\ossec.conf
Then add the directories you want Wazuh FIM to monitor.
Breakdown:
disabled=”no” → Enables the FIM module.
frequency=”60” → Wazuh performs scheduled scans every 60 seconds.
realtime=”yes” → Detects file changes immediately in near real-time instead of waiting only for scheduled scans.
check_all=”yes” → Monitors multiple file attributes such as file size, permissions, ownership, modification time, and hashes.
The * means the Downloads folder of any user profile on the system.
After modifying the config, restart the agent:
1
Restart-Service WazuhSvc
Verify FIM Detection
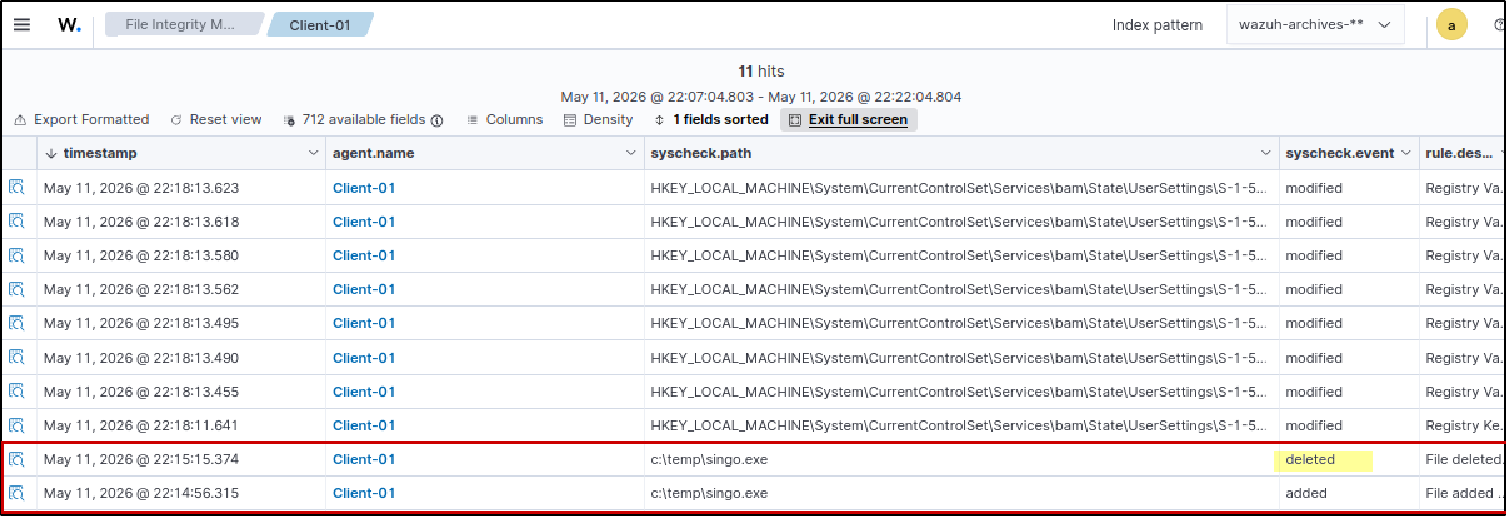
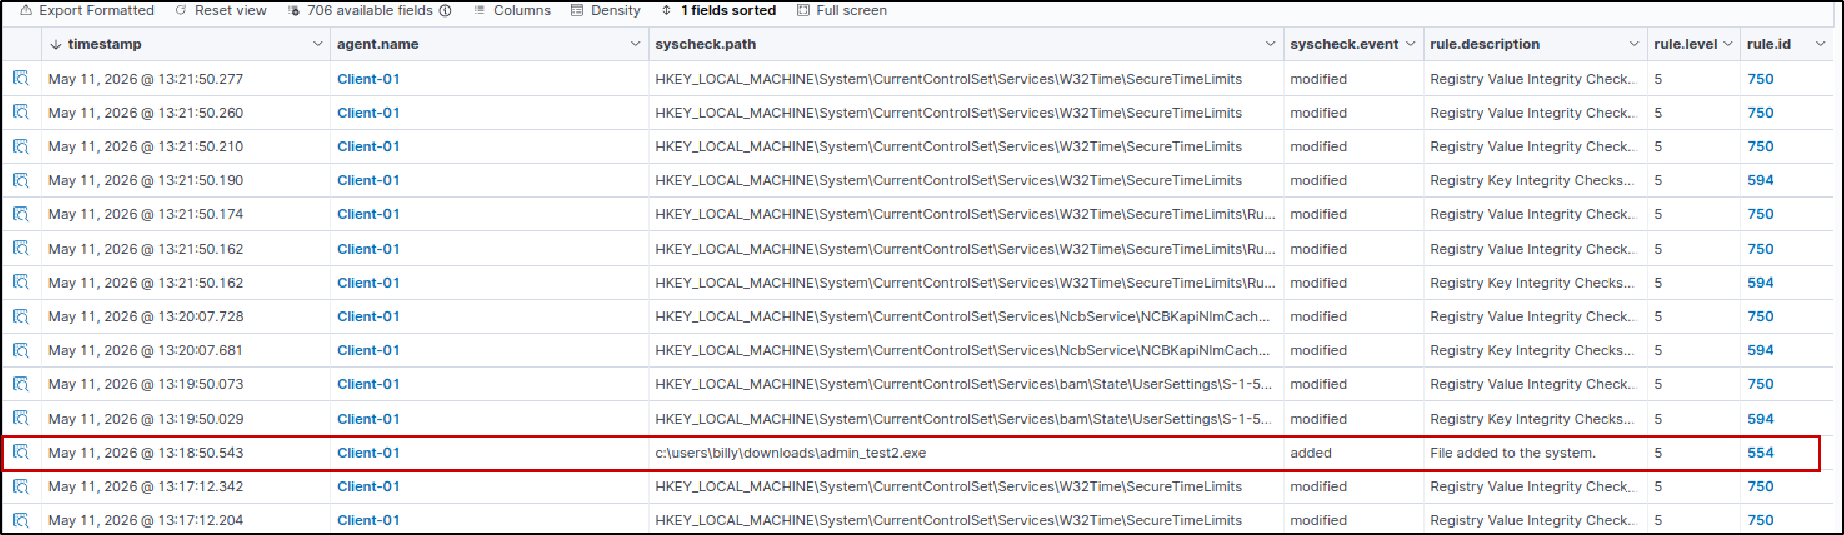
To confirm that Wazuh was successfully logging FIM events, I simply created a few test files. Even though they were empty files with no real content, Wazuh still detected the file creation events, confirming that FIM monitoring was working correctly.
Initially, I created files such as: evil.exe, evil2.exe, urm0n.exe just for testing.
Inside the Downloads folder, I also created: admintest_test2.exe

This is to confirm that Wazuh is monitoring file activity in both configured directories.
You do not need to create many files during testing — even a single test file is enough to verify monitoring.During troubleshooting, I created additional test files to help verify FIM detection logs. I had to adjust time range, filtered for the correct agent, and confirmed the related file activity events were appearing properly in Wazuh.
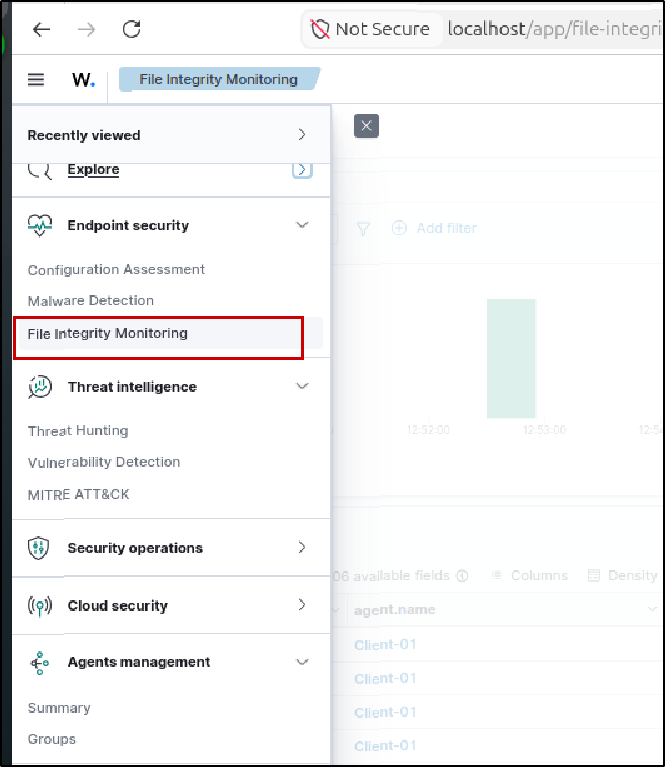
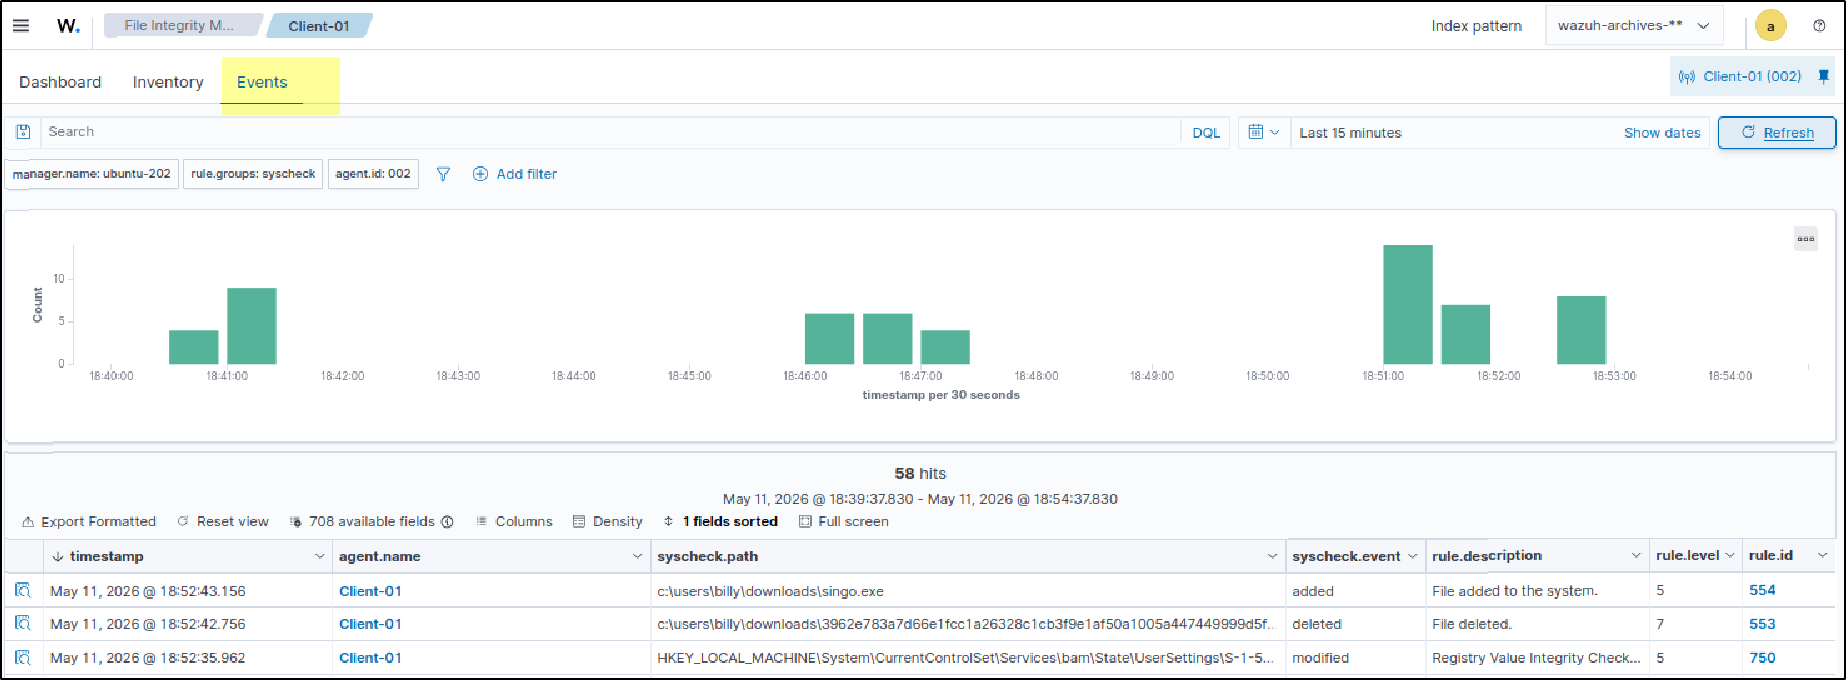
Viewing FIM Events
There are multiple ways to verify that Wazuh is logging FIM events from the agent.
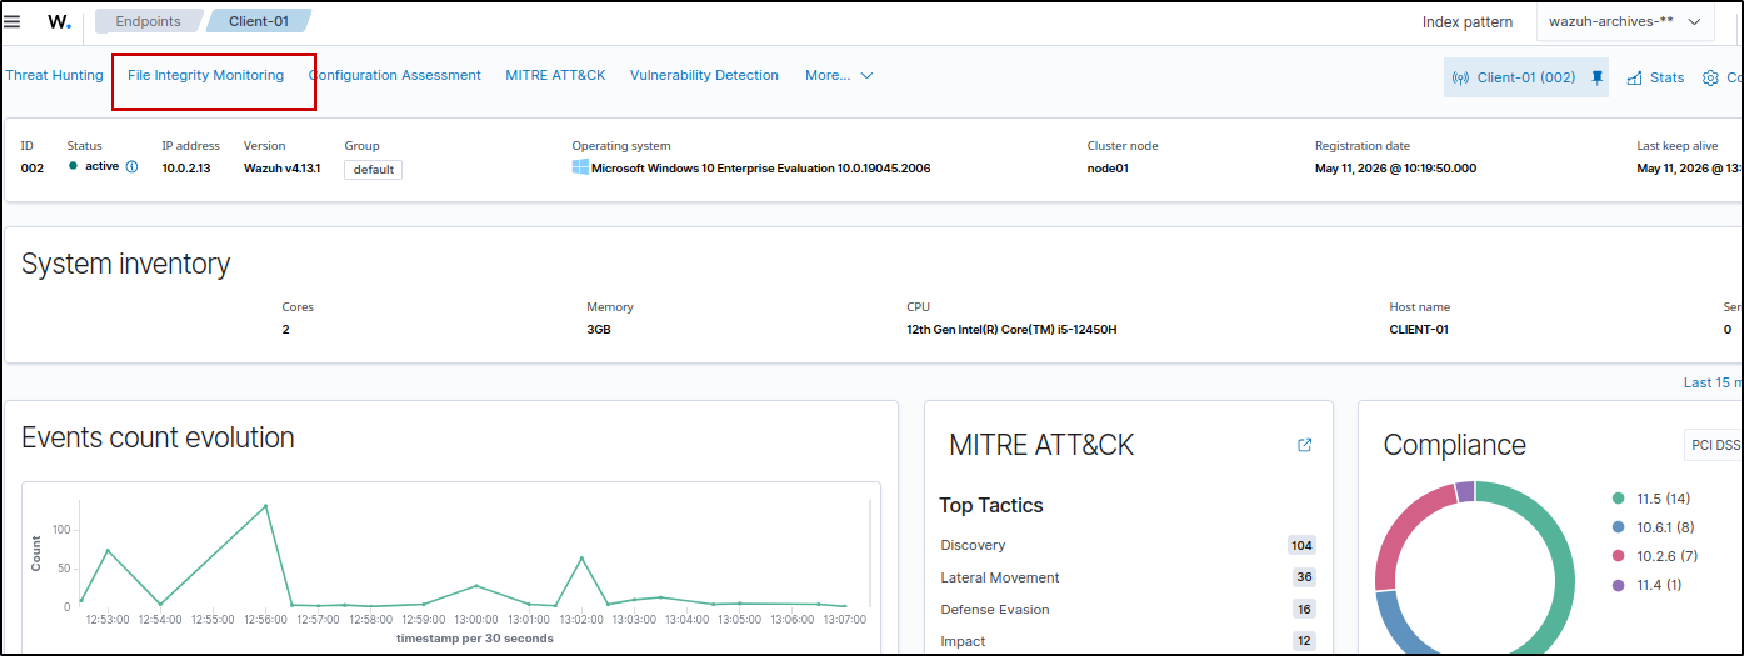
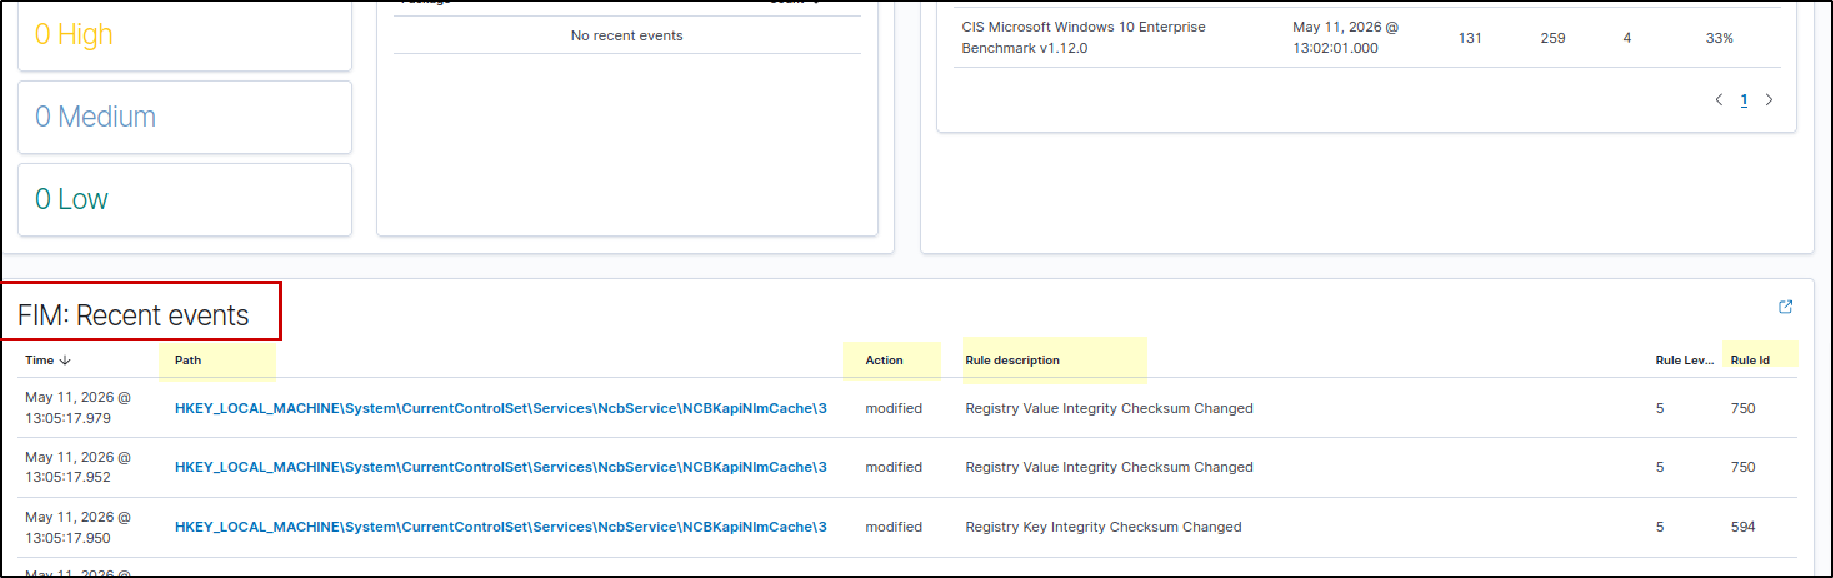
1) Navigate to: Home → Overview → Select Agent → FIM
This provides a quick overview of recently detected file changes only.
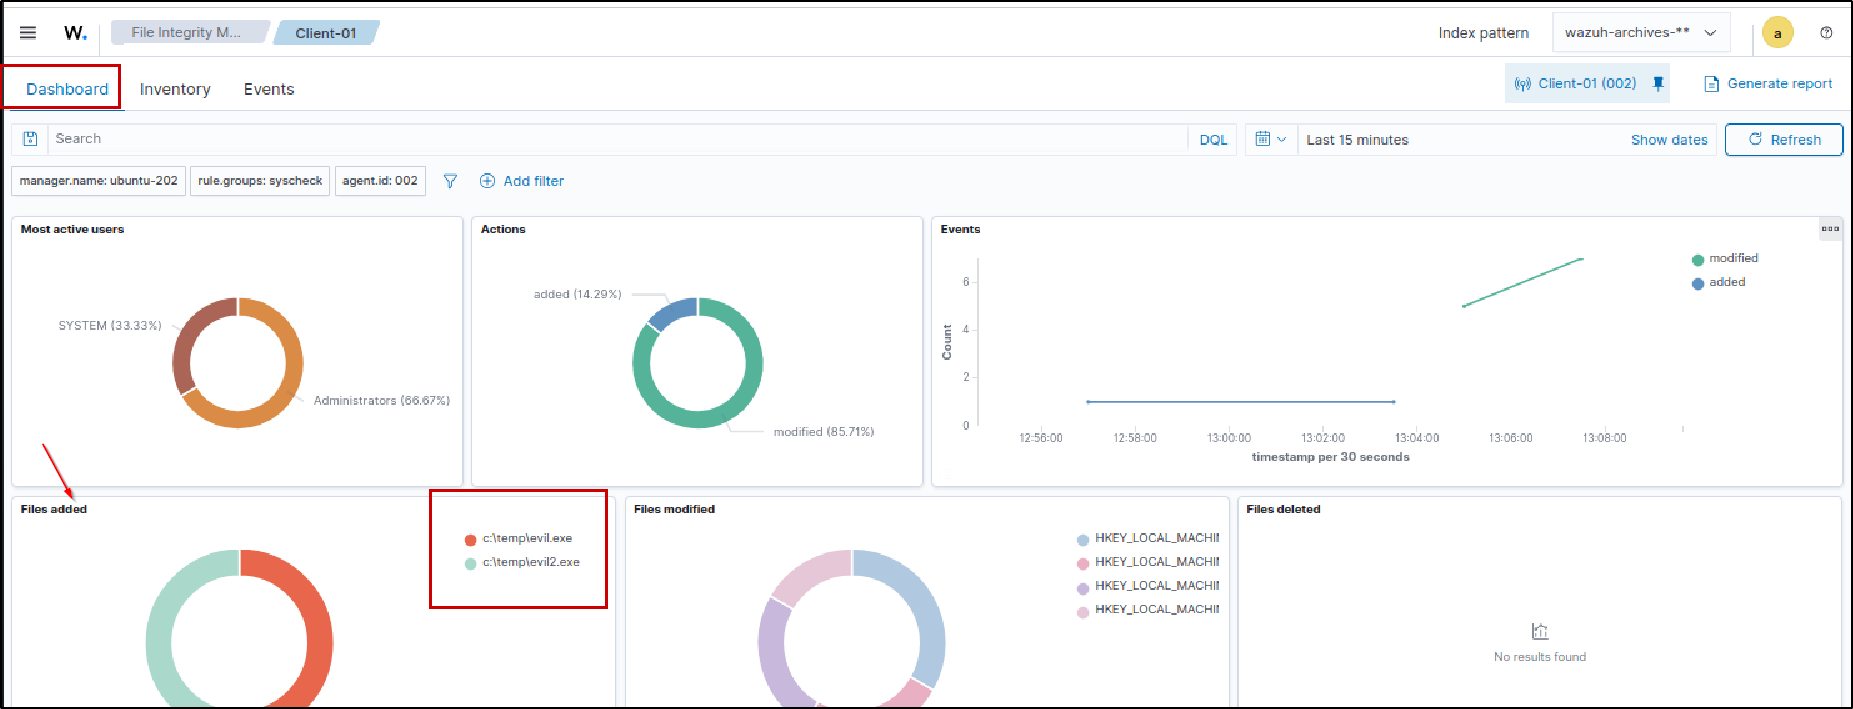
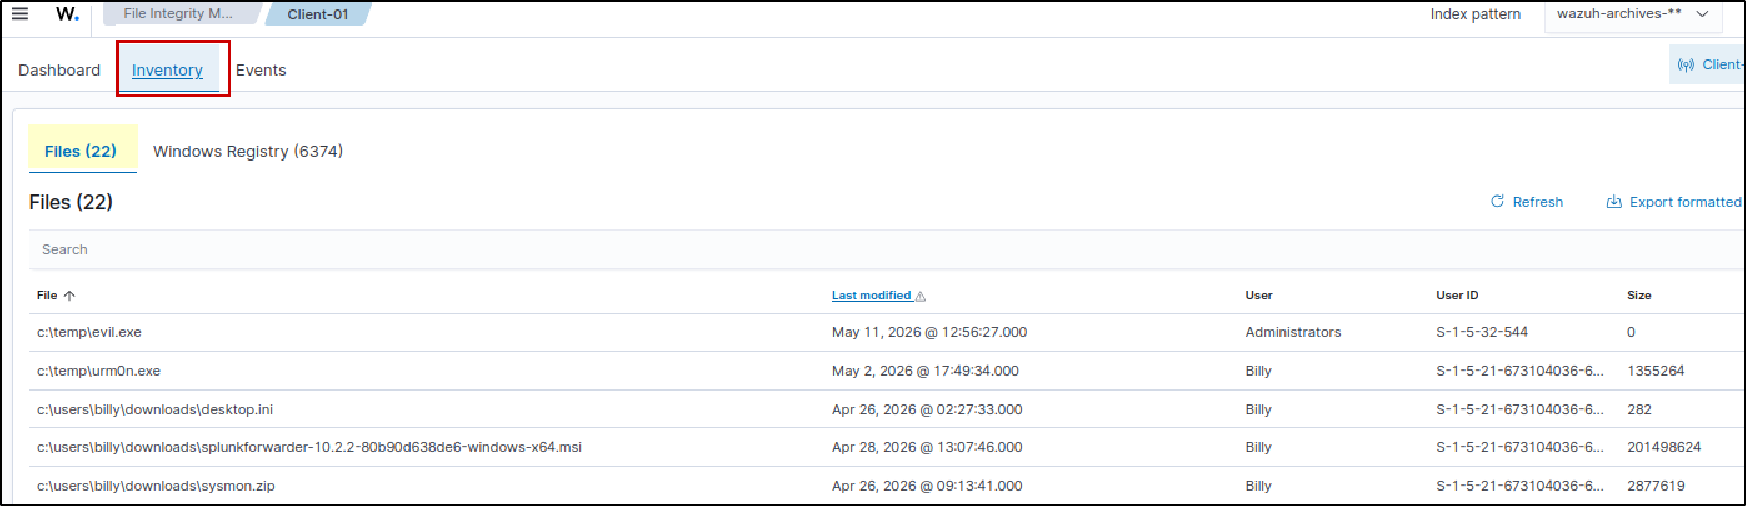
2) Next, Go to the FIM section in the Wazuh dashboard. Inside this section, there are three tabs that help view and verify FIM(File Integrity Monitoring) activity.
The Dashboard tab provides a quick overview of recently detected file changes and shows recently added or modified files.
The Integrity tab displays details about monitored files and directories, including the full file path, filename, file size, username, and modified time.
The Events tab provides detailed logs for all detected file activities such as file creation, modification, and deletion.
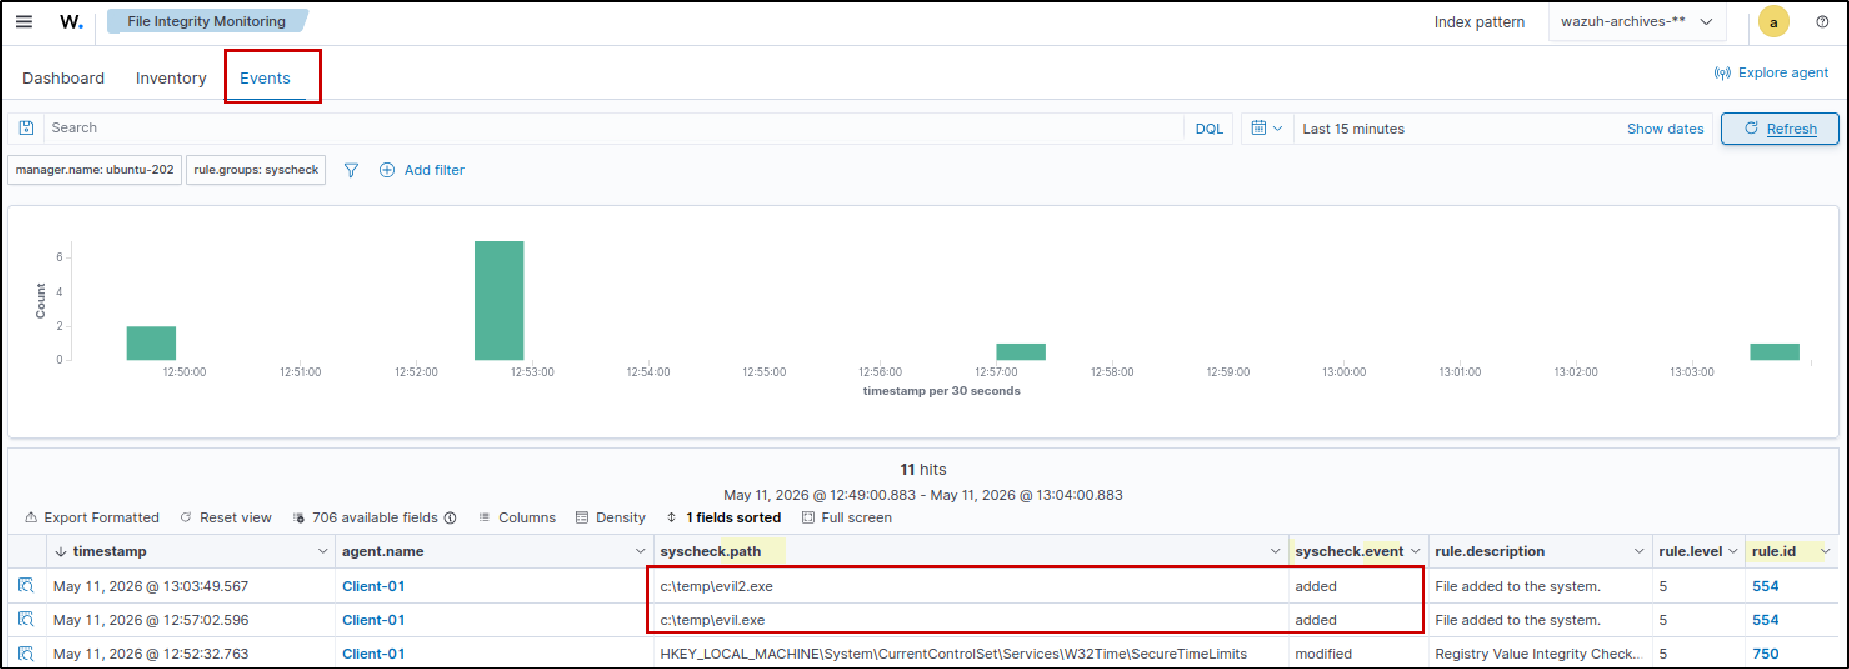
By reviewing these FIM events and file activity logs, we confirmed that Wazuh is monitoring the configured directories and detecting file changes in real time.
VirusTotal Integration
The next step is enabling VirusTotal integration so Wazuh server. So It can check hashes of newly created files against VirusTotal. When files are added into monitored directories:
If file hash is flagged as malicous , it will generate rule.id:87105
On the Wazuh server, open the configuration file and add the VirusTotal integration block between the
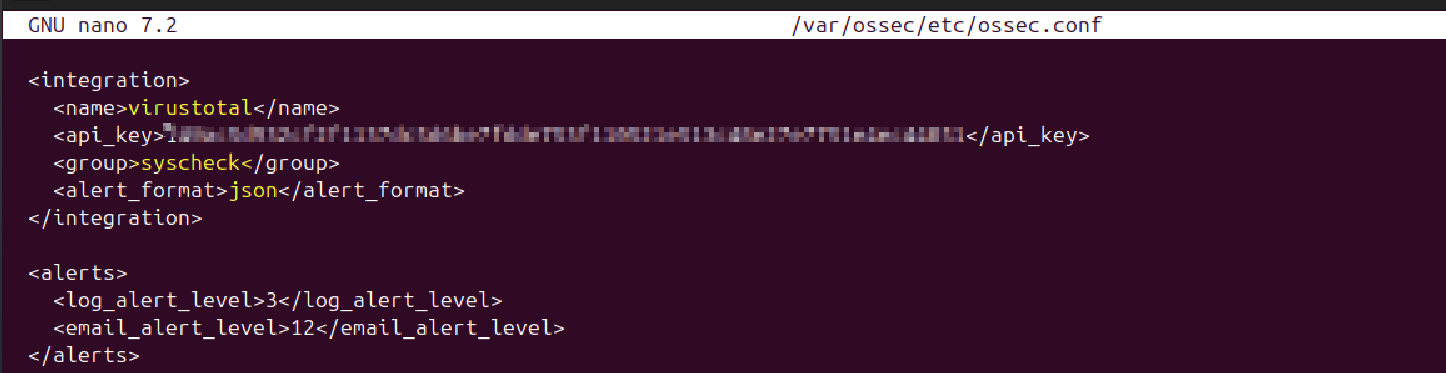
After saving the changes, restart the Wazuh manager. sudo systemctl restart wazuh-manager
Verify VirusTotal Detection
For testing, I downloaded a malware sample from MalwareBazaar into one of the monitored directories.
I also made sure not to execute the sample.
My client VM was isolated internally with no shared folders, clipboard sharing, drag-and-drop, or direct communication with the host system. A VM snapshot was also created before testing.
For a safe lab test, use the EICAR Test File instead of real malware. It’s designed specifically for AV/SIEM testing and is commonly recognized by VirusTotal.
1
certutil -urlcache -split -f https://secure.eicar.org/eicar.com.txt C:\Users\Billy\Downloads\eicar.exe
Note that Windows Defender may immediately detect or quarantine known samples, so it may need to be temporarily disabled in a controlled lab environment for testing purposes.
Downloaded malware sample into monitored directory
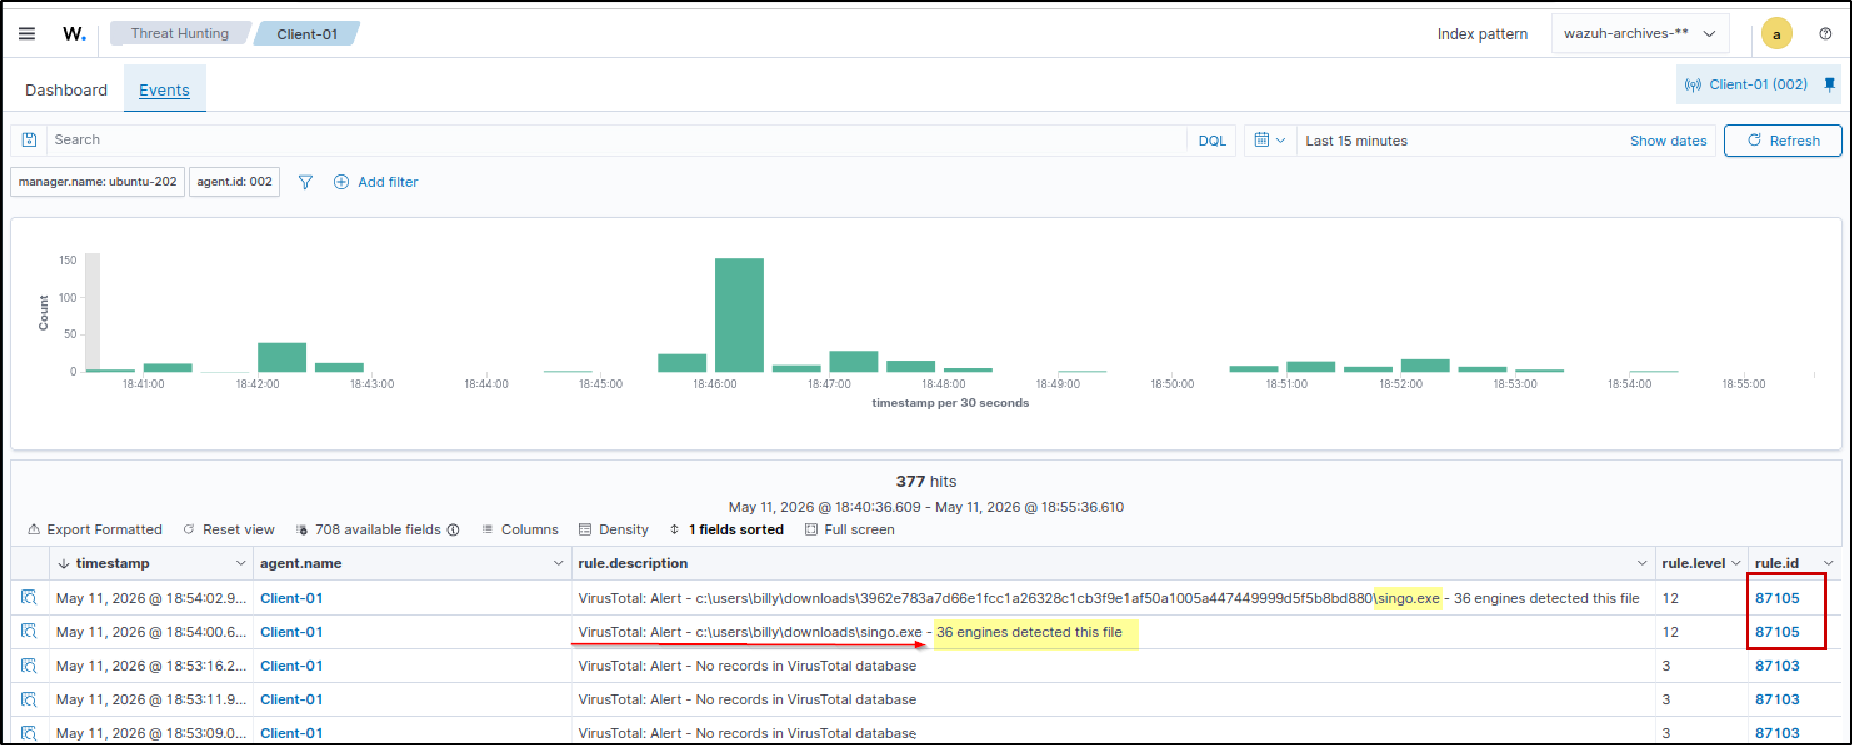
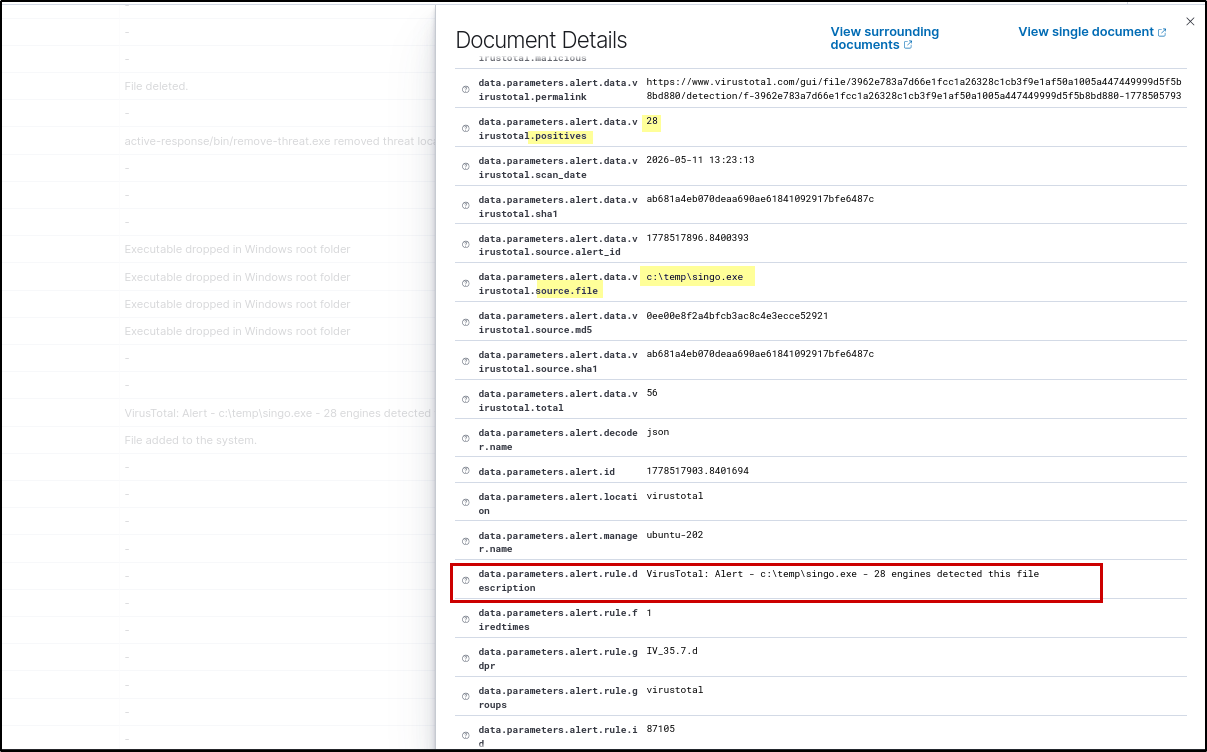
VirusTotal detected the file as malicious and flagged it.
When we expand the detection alert, we can view additional details such as the source file that triggered the rule, file hashes including MD5, SHA1, and SHA256, and the VirusTotal permalink. The alert also shows how many security vendors flagged the file as malicious, which in this case was 36 detections.
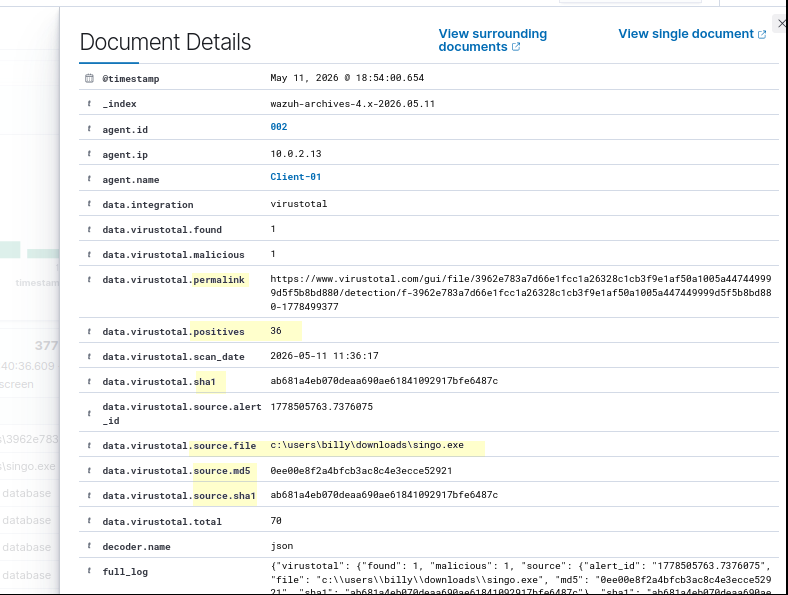
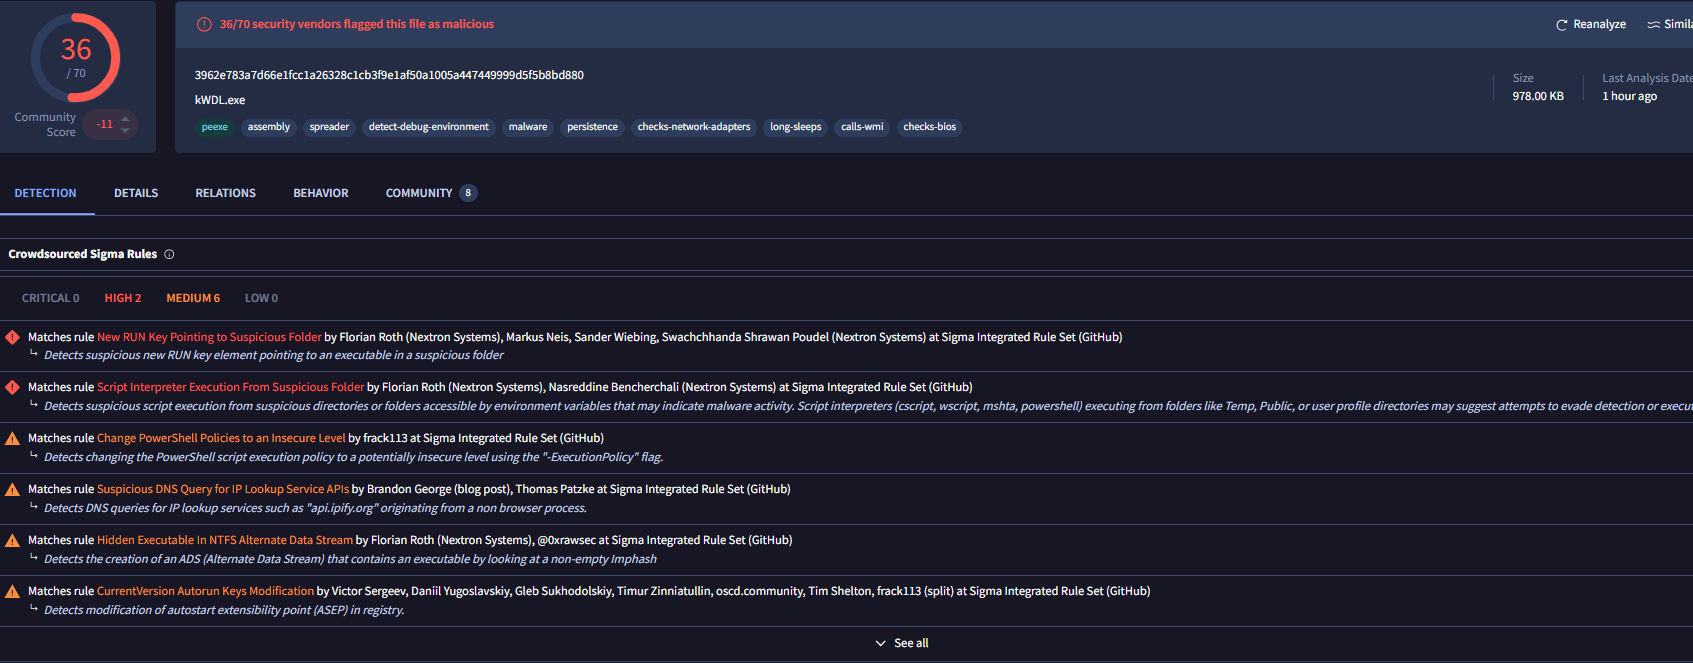
Opening the VirusTotal permalink provides more detailed information about the malware sample, including vendor detections, file behavior, signatures, reputation, and related threat intelligence data.
Active Response Script on Agent
Next, we create the malware removal executable on the Windows agent. This executable will be triggered when the Wazuh server executes the remove-threat Active Response command.
I am also linking the official Wazuh reference below, which can be used to copy commands, or follow the complete walkthrough for this same setup: Official Wazuh Malware Removal Walkthrough
- 1) Install Python on Windows from the official website and make sure to check:
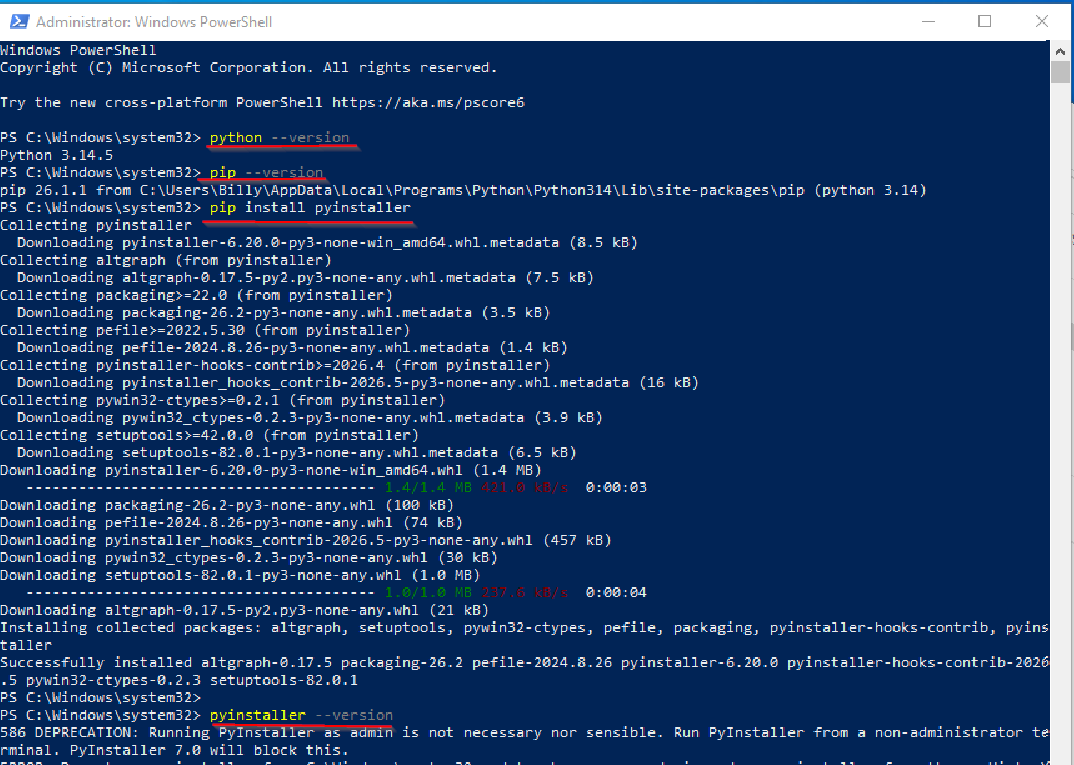
Add Python to PATHThen open Administrator PowerShell and verify Python and pip: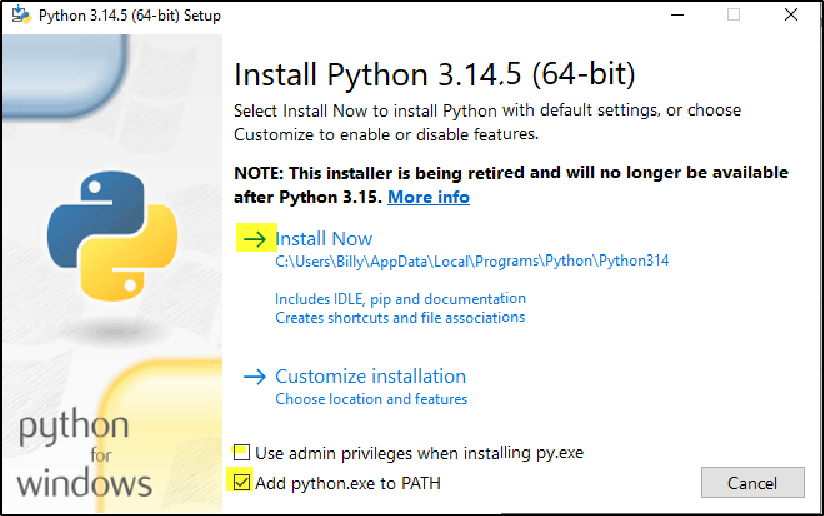
2) Next, install and verify PyInstaller:
3) PyInstaller is used to convert the Python Active Response script into a standalone Windows executable.
Create a file named:
remove-threat.pyPaste the Active Response Python script into the file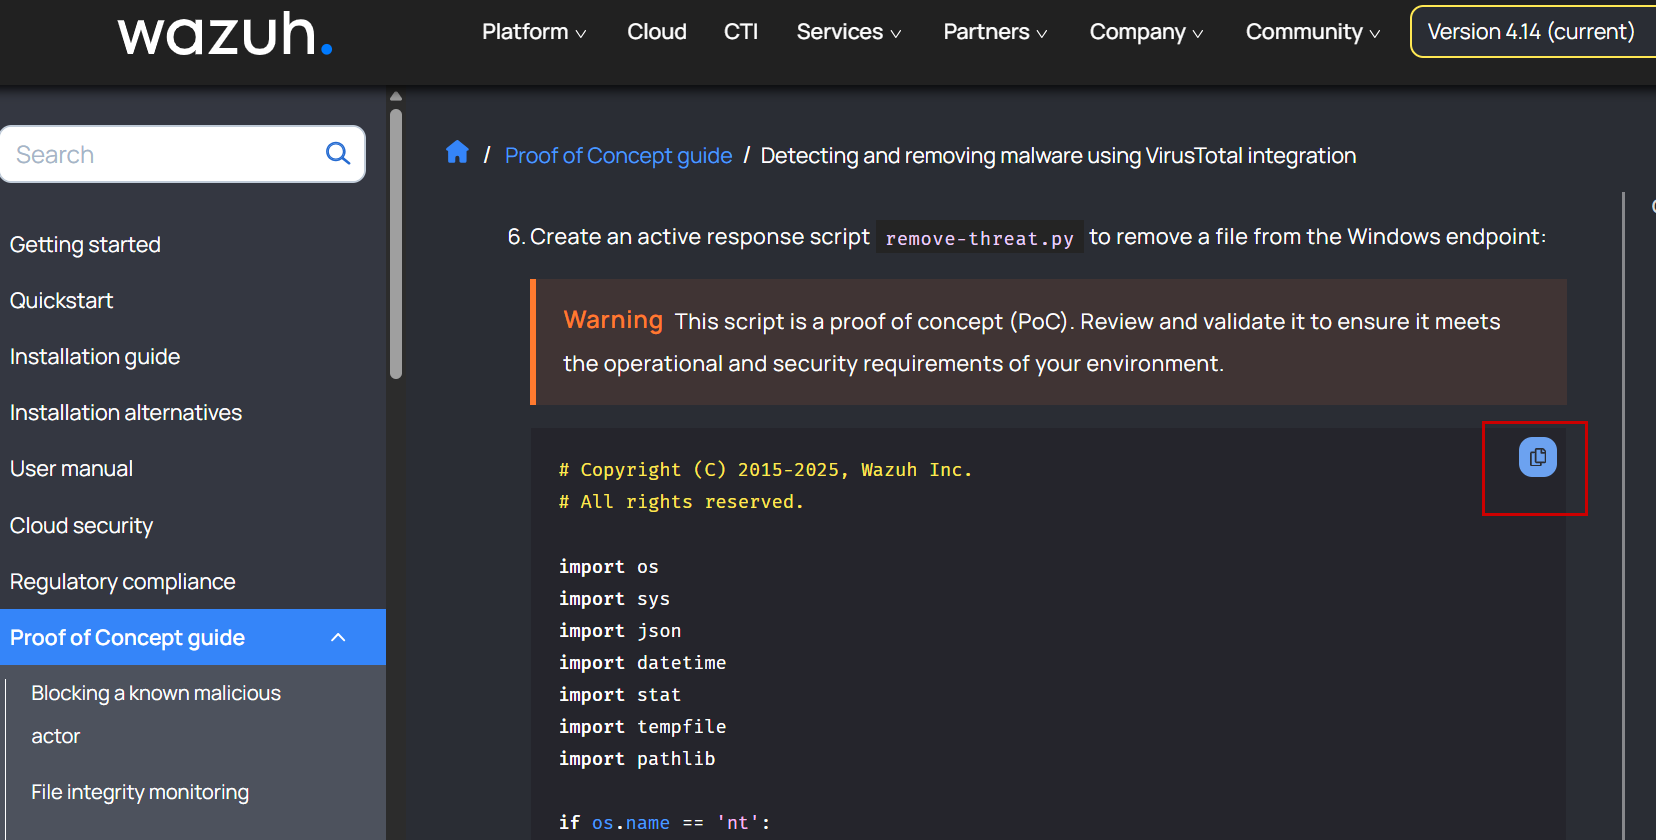
and temporarily save it anywhere, for example on the Desktop.
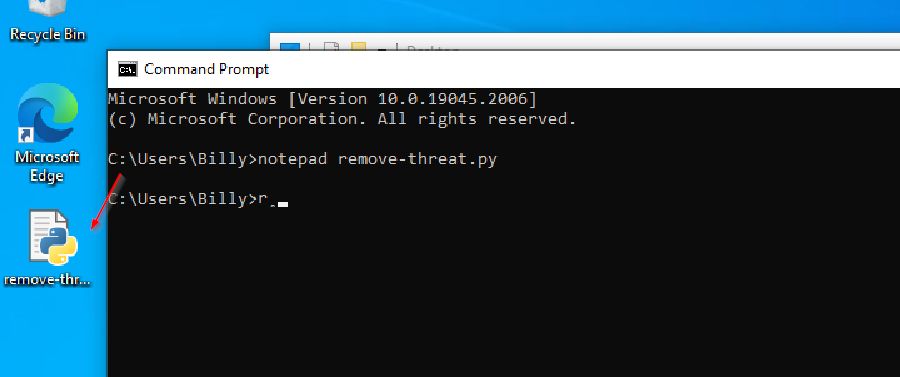
4) Then open Administrator PowerShell inside the script directory and run:
pyinstaller -F remove-threat.py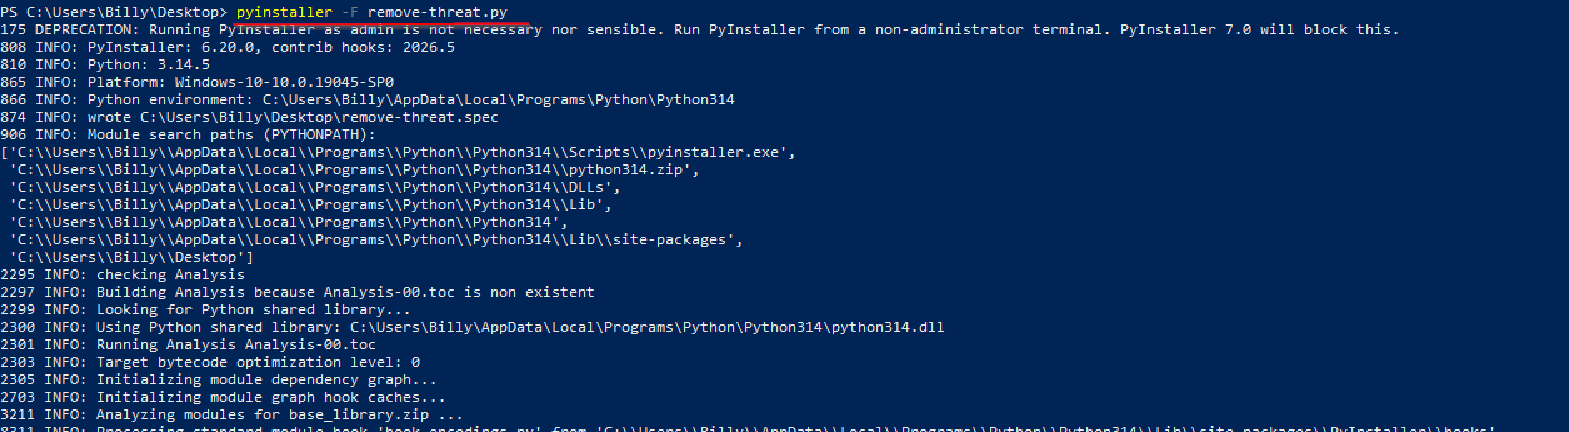
After completion, PyInstaller creates:
dist\remove-threat.exe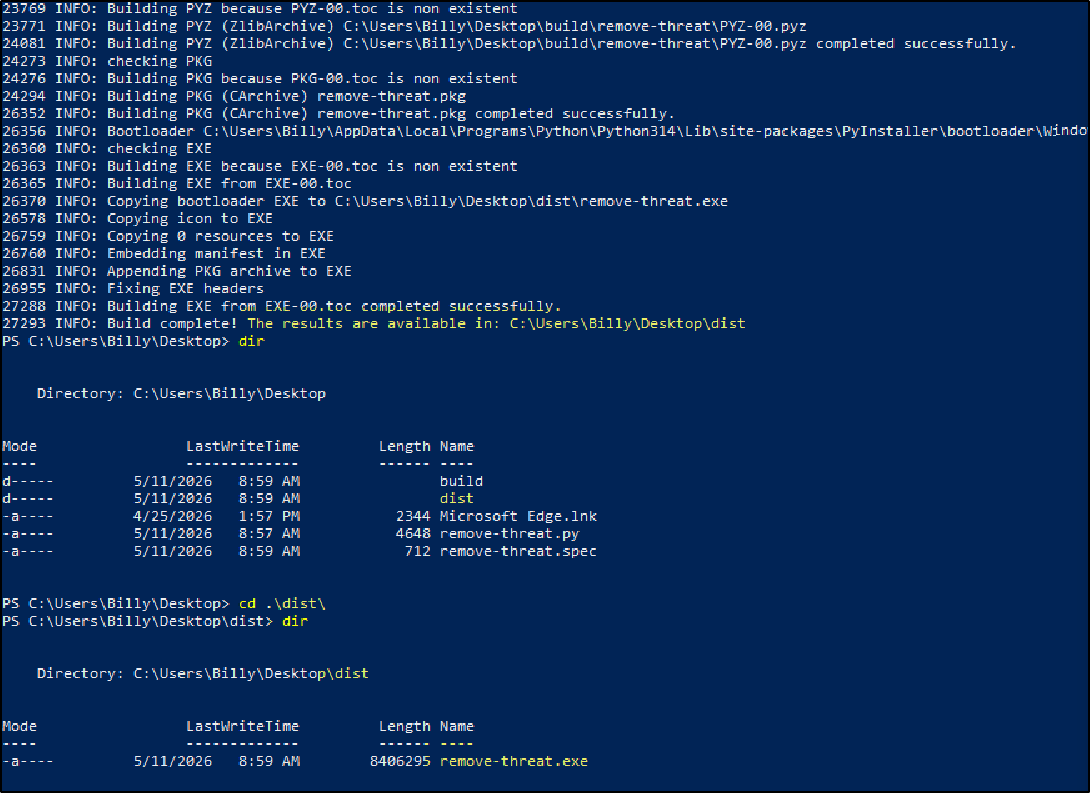
- 5) Move the generated executable into:
C:\Program Files (x86)\ossec-agent\active-response\bin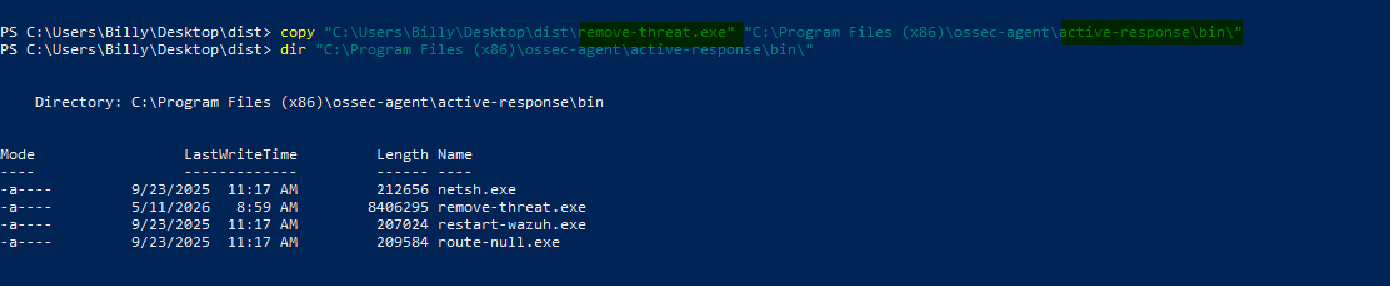
This allows the Wazuh agent to locally execute the malware removal Active Response command.
Active Response Configuration
Next, configure Active Response on the Wazuh server so it can automatically execute malware removal actions on the Windows agent.
Open the Wazuh manager configuration file: sudo nano /var/ossec/etc/ossec.conf
Copy and paste the Active Response configuration snippet into the file.
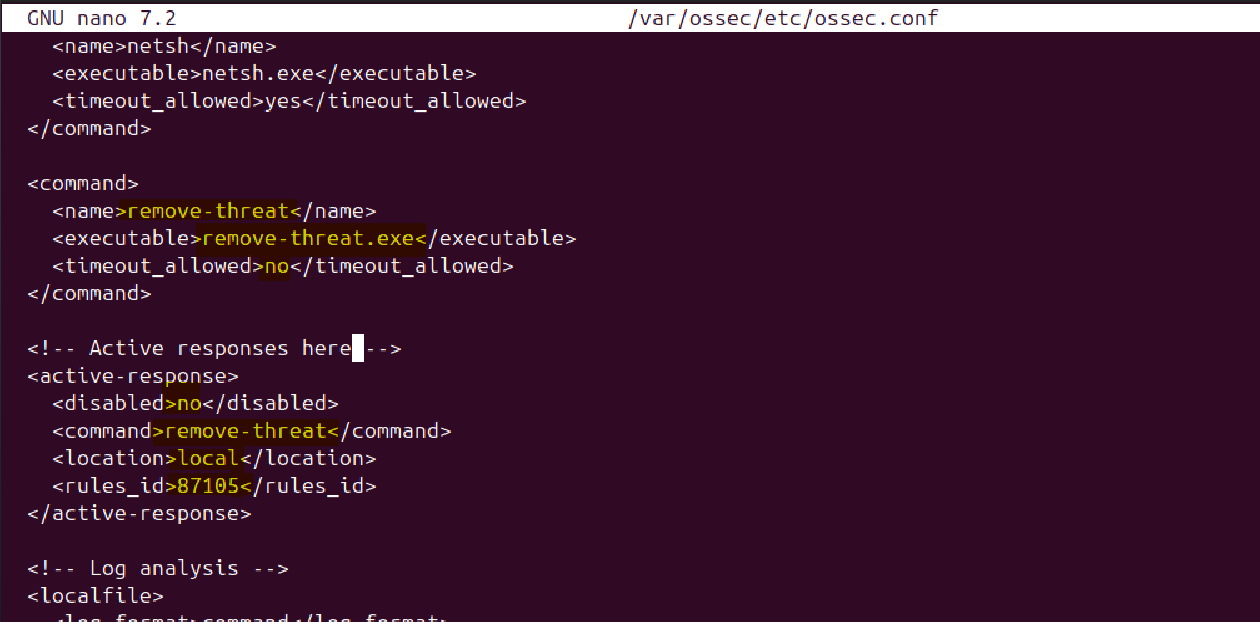 This configuration tells Wazuh to execute remove-threat.exe whenever VirusTotal detection rule 87105 is triggered for a malicious file.
Malware Removed automatically
I copied the previously downloaded malware sample into the monitored Temp directory. After about a minute, the file was automatically deleted by Wazuh Active Response.
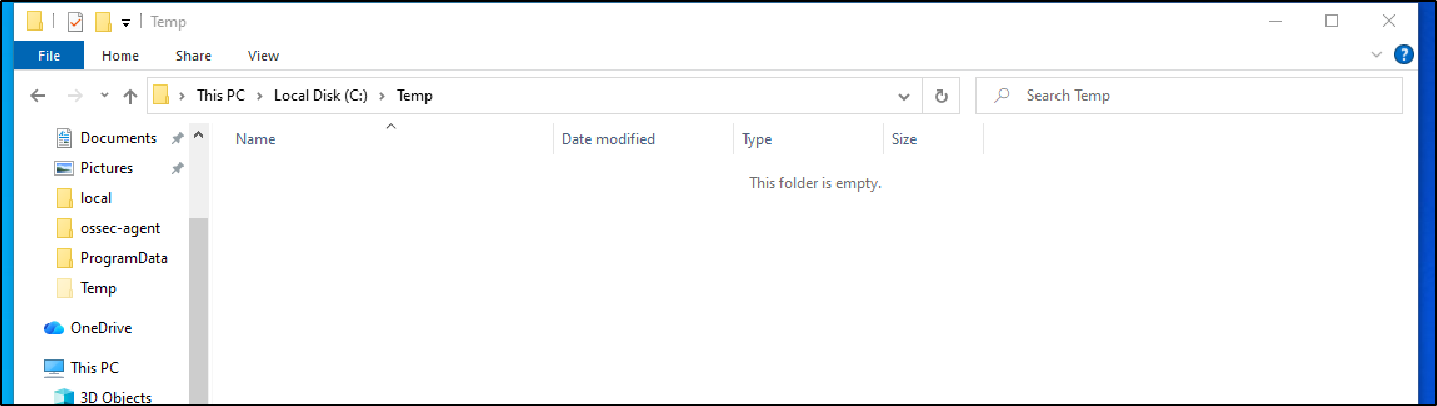
Malware file automatically removed from the monitored directory.
Next, checking the Wazuh events showed that VirusTotal detected the file as malicious. After the detection rule was triggered, the remove-threat.exe Active Response executable was executed, which then removed the file from the endpoint.
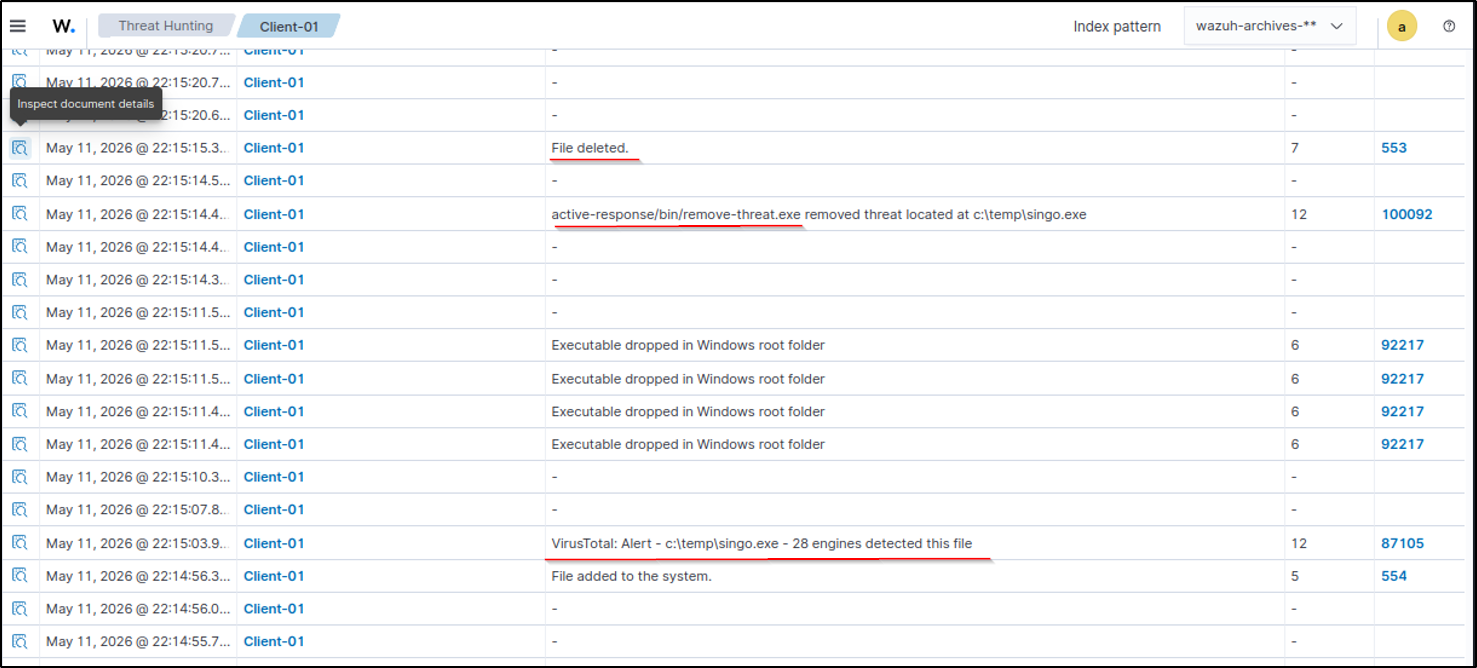
Active Response execution triggered after VirusTotal malware detection.
Expanding the event logs shows additional details such as the source file, hashes, VirusTotal detection results, and the monitored file path detected by Syscheck.
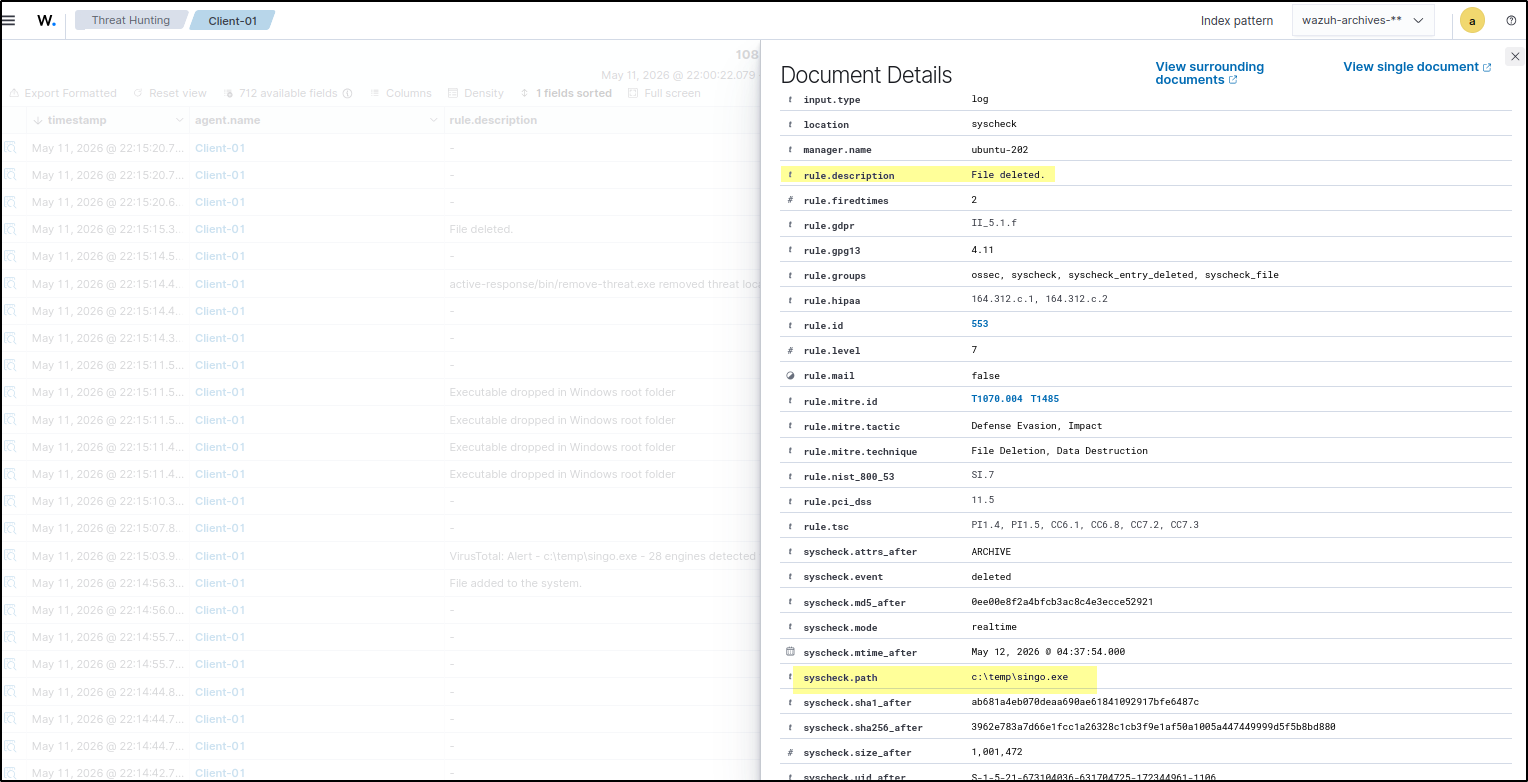
Malware File Deletion event
Finally, the file removal event also visible inside the FIM logs, confirming that the malware file was successfully deleted.